Washing Your Car in Winter Months

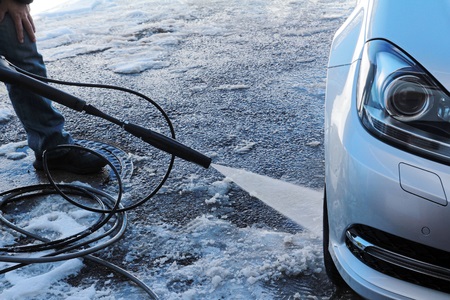
Washing your car in winter months is just as important as washing your car in summer months.

Most mechanics will tell you that as part of your car maintenance, regular washing is important, especially in winter months when salt and sand covers the roads.

Washing your car in the winter can help preserve your car long-term. Washing in the winter is critical because you are removing all of the debris that typically rusts and rots a vehicle quickly, like salt, snow, ice, and mud.

It might feel bizarre to wash your car in relatively cold temperatures, but as long as temperatures aren’t below freezing, it is a task that will do your vehicle a lot of good.

In fact, you should be washing your car once a week in winter months.

Road salt often can result in a car rusting out if the salt sits on the body of the car for too long.  Not only does rust look bad on a car, it also eats away at the body and the under carriage.

Simply rinsing your vehicle with water won’t do the trick of removing built up snow and salt and you’ll need to scrub your car with soap and water, and thoroughly dry it after doing so.

The supplies you use will have a big impact on how clean your vehicle gets.

Our microfiber towels are a great tool to use for drying your car off after washing, which is a vital step in washing your car in winter months.

Due to cold temperatures, you need to be sure your car is completely dried off so water doesn’t freeze onto your car.

Microfiber

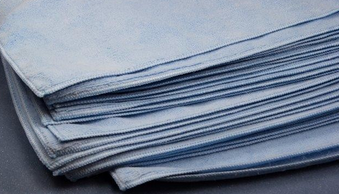
The benefits of using a microfiber cloth to dry off your car include:

  1. Microfiber does not scratch.
  2. It does not leave behind any soap residue.
  3. There is no need for additional towels to be used.
  4. Microfiber locks in moisture, leaving your vehicle 100% dry.
  5. Microfiber also locks in dust and other debris that may not have been washed off.
  6. The finished product is shiny and looks polished.

If you are planning to wash the salt off of your car as a part of preventative car maintenance, take a look at Spongeoutlet’s microfiber towels to make the job easier.

How To Clean a Microwave Using Our Eraser Sponge

Using a microwave has become a convenience many people are enjoy using in daily cooking.

Sometimes, at the end of a long day, it’s such a luxury to be able to heat something up in the microwave instead of preparing a meal for yourself.

However, microwaves are not our cleanest household item.

Many of us let food splatter and we are guilty of saying we will “get to it later” but find ourselves never going back.

Microwaves are notorious for containing germs, especially if the microwave is rarely cleaned. Germs multiply most easily in warm settings, making the microwave the perfect spot for them to settle down.

A dirty microwave can result in food poisoning, cross contamination, and a variety of viruses.

We should be cleaning our microwave after each time we use it but most of us don’t.

Eraser Sponge Blog logoOur eraser sponges are the perfect tool to use to clean out a dirty microwave. You’ll need a few other supplies as well, but our eraser sponge will get you started.

Using our eraser sponge, scrub out any food splatters from walls, rotating tray, and door.

This will help get all of the tough spots cleared out first.

Some food may be hard to remove but the eraser sponge can handle tough grit, grime, and dirt.

(All of which are in a household microwave!)

After you clean the microwave with our eraser sponge, you should steam clean the appliance.

  • Using a microwave-safe bowl, vinegar, water, and a sponge, you can get your microwave looking brand new. Pour an equal amount of water and vinegar into a bowl, usually half a cup of each works well.
  • Put a toothpick into the solution before you start. You’ll notice that bubbles form on the toothpick allowing it to boil without exploding.
  • Leave the bowl in your microwave for about 5 to 10 minutes depending on how dirty it is. When the minutes are over, let the microwave stand with the door closed for several minutes allowing steam to penetrate the microwave.
  • Be sure to have oven mitts on hand in order to take the bowl out which will be extremely hot.
  • After you remove the bowl, stick the eraser sponge into the bowl when the solution is still hot and scrub the rest of your microwave.
  • Make sure you wipe down corners, windows, walls, and the outside of the microwave as well.

Our eraser sponges are also disposable so once it cools down, it can be thrown out. Visit Spongeoutlet.com for more of our cleaning products, and enjoy your “new” microwave!