Get your home ready for summer activities, cookouts, and guests with these summer cleaning tips.
Summer Cleaning Checklist Tip 1: Get Your Outdoor Spaces, Ready for the Summer
It’s important to give the exterior of your home and outdoor entertainment spaces a good once-over when the summer starts. Here are the areas you should pay attention to:
Household Vinyl Siding: Use an eraser sponge to remove mold, mildew, dirt, and grime. If you have a large area to clean, our Super S Eraser Sponges (12 Pack) will help shorten your cleaning time due to the their large size.
Windows: Use an eraser sponge to remove any dirt or grime from windows. The eraser sponge extension handle kit can help you reach the upper areas of the window with ease as it extends up to three feet. No ladders or step stools required!
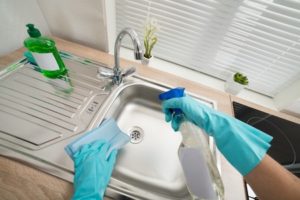
Cleaning your home probably isn’t your favorite way to spend the weekend, but it’s important to do a deep clean of your home’s main hang-out areas, like the kitchen, at least once a month. But, a simple wipe down of the countertops won’t do it. One place that tends to get over-looked during your weekly sweep and dust is your kitchen appliances. Can you remember the last time you gave your microwave a good wipe down inside and out?
SpongeOutlet.com is here with some tips for cleaning your kitchen appliances.
No matter what type of appliances you have, new, old or stainless steel, we’ll help you get them sparkling clean in no time!
Ice Maker
Whether you have the typical ice cube trays or a more sophisticated built-in version, your ice maker needs to be cleaned about once a month. When it doesn’t get proper care, it can foster an unsanitary environment, leading to germ growth and potential health risks.
If you have a fridge and freezer with an ice machine built into the freezer door, the manufacturer probably has a cleaning solution that can be used to safely clean the icemaker. If you no longer have your owner’s manual, check online for their recommendations.
To get started, unplug your fridge and transfer any sensitive items to your secondary refrigerator. Wipe down the ice drawers with mild soap and warm water, and thoroughly dry the area with a towel before you close the door.
If your freezer and ice maker has a filter, change or wash it. Then, de-clog any chutes that may have built up excess water by using a warm, damp cloth to melt the built-up ice.
Check the filter behind your fridge, and if it needs to be dusted, take care of that before you plug it back in and slide it back where it belongs.
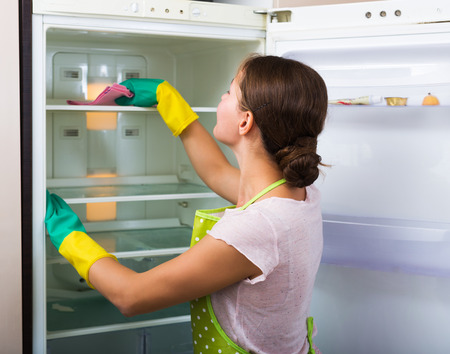
Fridge & Freezer
While you’re working on your ice maker, don’t forget to clean your fridge and freezer. After time, food spills and crumbs on the shelves can cause odor, mold growth, and an unpleasant look. Remove everything from the fridge and freezer, and use a warm, damp cloth with a mild soap to remove any built-up food items. Some fridges and freezers may have removable doors that you can pop in your dishwasher.
Don’t overlook the vegetable drawers: those areas tend to get messy the fastest and may need a wipe-down once a week!
Blender & Mixer
If you use your blender regularly, you know that the blades can be tricky to clean, but it’s important to clean them thoroughly—otherwise, food particles will remain there and cause mold growth. You wouldn’t want that to end up in your next smoothie or milkshake!
If your blades are machine washable, give them a scrub with a small kitchen appliance brush, and pop them in the dishwasher. Make sure you check under the blades and under the center piece to make sure all the food from this morning’s protein shake is removed.
Coffeemaker
RealSimple.com says that your coffee maker is just as important to clean regularly as your favorite mug. Follow the instructions for cleaning and rebalancing in your owner’s manual. Start by removing and washing the filter and the carafe—if you have a reusable filter, avoid using soap but rinse the filter thoroughly.
Brew a pot of 2-3 cups water, with equal parts white vinegar to clean out the innards of the coffee maker. You may need to repeat this step a few times. Turn the machine off about halfway through the cycle to let it sit, and then turn it back on.
After your vinegar brew, brew 2 pots of regular water to remove any vinegar deposits. And, don’t forget to show the outside of the coffee maker some love with a good wipe down with soap and water.
First, remove the racks and drawers from your dishwasher. Clean the interior with warm soapy water and a soft cloth. Run an empty cycle with the detergent cup full of vinegar or powdered lemonade mix to remove stains.
Microwave
To give your cruddy microwave a makeover, microwave a large bowl of water with slices of lemons until the water boils. Remove stains with a soft damp cloth and soapy water. Remove the tray and wash with hot water and dish soap or run it in your newly cleaned dishwasher.
Toaster
HouseLogic.com says to start by unplugging your toaster. Remove and wash the crumb catcher, making sure it’s completely dry before replacing it. Shake the machine upside down over the sink to dislodge loose crumbs.
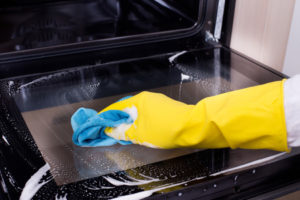
Oven
Most ovens have a self-cleaning option: while that runs, remove the grates from the stovetop and stick them in the sink. Fill the sink with hot water and dish soap and let the grates soak to remove stubborn cooked on food. Replace drip plates that have seen better days, and clean everywhere: including under the top of the stove. You can use your vacuum cleaner to remove hard to reach crumbs.
Pick up all the supplies you need to give your kitchen appliances a deep clean at SpongeOutlet.com. Our eraser sponges can help you remove tough stains and stubborn baked-on gunk. For more cleaning tips, check out our blog often!
Your bike is your loyal companion out on the road or trail. When you return from a long day of pedaling, chances are you’ll toss your favorite bike shorts and windbreaker in the washing machine—but when’s the last time you washed your bike?
If your bike is looking a little worse for wear these days, but you’re not sure where to get started to make it look like new again, you’re in luck: SpongeOutlet is here today with a step-by-step guide to cleaning your bike. Read on, pick up the supplies you need, get started, and then get back to the trails!
Plus, cleaning your bike regularly will maintain its paint job and keep it looking as good as the first day you rode it out of the bike shop. If you don’t clean your bike regularly, the dirt and grime build up can start to impact some of its mechanical integrity.
Gather Your Cleaning Supplies
You’ll need a few things to properly clean your bike, so the first thing you should do is gather your supplies. Grab two buckets, bottle brushes if you have them, a soft microfiber cloth, regular sponges, eraser sponges, a garden hose, degreaser for the chain, and dish soap.
Depending on the type of bike you have, there may be specific cleaning instructions, so make sure you check the internet before you dive in with your scrub brush. If your bike company or brand recommends a certain type of soap, it’s probably a good idea to pick up a bottle. Your bike is made to last through tough conditions, but it’s important to make sure you’re doing everything you can to maintain its paint.
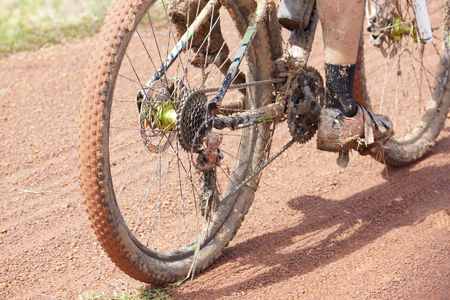
Step One: Clean Your Bike Wheels
The first thing you want to do is fill your buckets with dish soap and water and remove the wheels from your bike. Use a soft, plastic brush to gently remove grease and grime from your wheels. Don’t forget the valve, spokes and hub, and flip the wheel over when you finish one side.
One of the buckets will be the grimy bucket, and the other will be the finishing bucket. Use the cloth or sponge in the grimy bucket to do your first round of washing—give everything a good wipe down.
Once you give everything a good scrub, hose down the wheels. Then, swap to the finishing bucket, and re-scrub everything. This will ensure you loosen all of the fine dirt that might be stuck in your wheels’ nooks and crannies.
Once you’re done with the wheels, check the tires for air and set them aside to dry.
Step Two: Clean Your Bike Chain
Use a degreaser, and apply it to each of the links: Bicycling.com says turning the cranks backwards can make it easier to reach each and every link. If your chain is still a greasy mess after you use your degreaser, you can apply a little dish soap and run your eraser sponge around the chain.
A little grease left over is OK, as long as you remove the major build up. Rinse the chain, repeat if necessary, and move on to step three.
Step Three: Clean Your Bike Frame
Next up is the frame: use a soft sponge or microfiber cloth and start at the top and work your way down. Start by wetting the frame with a garden hose, and then using your cloth to scrub it. Tough spots can be tackled with eraser sponges, just be careful not to damage the paint with too much harsh scrubbing.
Rinse, repeat, and then buff with a dry microfiber cloth to make sure all areas of the frame have dried to a sparkling finish. Buffing your bike after you clean it with a microfiber cloth can actually prevent dirt from sticking to it while you’re out on your next ride!
Step Four: Clean the Smaller Parts of Your Bike
Use a toothbrush to get the grime and grease out of any hard-to-reach areas on your bike, and don’t forget to dry and buff those areas really well when you finish up. And, remember to wash things like handlebars, cup holders, and pedals. Some of these pieces may be easy to remove, so if you’re going for a deep clean, snap off the pieces and clean them before reattaching them to the bike.
Just like any pastime, riding a bike can be fun, relaxing and rewarding, but it’s important to take care of your equipment. After all, you spent a good deal of money on it! So, remember to regularly wash your bike, and if you’re not up for a weekly deep clean, a wipe down with a microfiber cloth and some soapy water after a ride in between deep cleans will do the trick.
For more tips on cleaning items around your car, office and home, check out our blog. Contact SpongeOutlet today if you have any questions about our products or how you can use them to keep your life sparkling clean!
Finally, we’re able to enjoy some good weather! The sun is shining, it’s warm and comfortable, but your outdoor furniture is covered in pollen and dirt from last year…
Well, not to worry, SpongeOutlet is here today with some tips on how to clean your outdoor furniture this summer.
Whether you just broke your outdoor furniture out of the garage, or you’re finding that it needs a good wipe down after it’s been out on the back deck for a couple weeks, we have the info you need.
Dirt & Dust Build Up
Outdoor furniture is prone to dirt and dust build up, so it’s important that you properly store it when you’re putting it away for the winter. If you can, wrap it in an old sheet or cloths to keep the dirt at bay, and keep it in a dry spot in your garage or shed.
When you first take your furniture out of storage, even if it was covered, you’ll need to give it a good wipe down before it’s safe to sit on. The first thing you should do is attack the furniture pieces with a bucket of soapy water, and a microfiber cloth or paper towels. This will remove all the fine dirt and dust that built up on the chairs during the winter months.
Don’t skip this step, even if your chairs were stored in a clean space, dust is everywhere! And you don’t want it to transfer to your guests’ clothing once they sit on your furniture.
Make sure you choose the proper soap for your furniture. If your furniture is wicker or wood, you’ll need to use an oil-based soap to remove any dust and grime from the surface. Metal frames can be cleaned with mild dish soap.
Don’t forget to give everything a good rinse, and let it dry completely before you use the furniture.
And, if your furniture is hard wood, you may want to sand the surface and apply a fresh coat of paint each year before use.
For areas that have become rusty or stained from last summer’s use, that you can’t clean easily with a cloth and soapy water, take an eraser sponge to the area. Eraser sponges will remove any tough stains from the surface of your furniture but be careful in areas where the paint is chipping—you want to avoid causing further damage to the paint.
Cushions
If your outdoor furniture has cushions attached, you should follow the cleaning instructions on the pillow tags. If they are machine washable, toss the covers in the wash and make sure they are completely air or tumbled dry before you use them. If your cushions aren’t machine washable, you can probably still clean the surfaces of them with a damp cloth to remove any dirt or dust.
Maintenance
On a weekly basis, hose down your furniture to remove debris like leaves and bugs that could damage the integrity of the rust-resistant paint on the surface of the furniture. Make sure that you take the cushions inside whenever you can if it’s going to rain: prolonged exposure to rain without ever becoming fully dry will cause mold to grow inside and on your cushions.
About halfway through the summer, or once a month, give your furniture another wipe-down with a cloth and soapy water, to make sure that you’re removing any dust and dirt that’s stuck to the surfaces. And, if there are any stains, use an eraser sponge to get rid of them right away.
If you have a big party and your furniture is used heavily over the course of an evening, it’s a good idea to hose everything down to remove food and alcohol particles that could cause problems down the line.
And, if you know there’s going to be a big summer storm, bring your furniture inside or tie it to your deck to avoid it being thrown around in the wind and damaged, or damaging something else, like your house!
Proper Storage
At the end of the summer, repeat the deep clean that you performed at the beginning of the season to remove dirt and grime, and store your furniture in a place where it will stay dry and not too cold, if possible. Wrap your furniture with old sheets or cloths, and keep any fabric or pillows sealed in a storage bin.
If you follow these simple (and frequent) cleaning tips, your furniture will last you for many summers to come. In the meantime, get outside and enjoy the beautiful weather!
For more information on Sponge Outlet products, or for more cleaning tips for around the house, head to our blog often! Questions? Call us at 877-776-6430.
Finally moving into your new home is so exciting: you get to rearrange all of your furniture, buy some new pieces, and decorate the space exactly how you pictured it in your head. But before you can get to all of the fun parts of moving, there are a few things you need to take care of first, including cleaning your new house from top to bottom.
Whether your home is a new construction, or you’re moving in after the previous owners vacated, it’s a good idea to do a deep clean before you move in any of your belongings. That way, you won’t have to worry about certain difficult cleaning tasks, like shampooing the carpet, once your furniture is all moved in.
If you’re not sure where to start, not to worry: SpongeOutlet is here today with some tips for cleaning your new home.
Read on for our cleaning guide, and get that new home cleaned out before the move-in date.
Sanitize the Bathrooms
The bathrooms are a great place to start. Even if they appear to be clean enough, your bathrooms can benefit from another deep clean and disinfect. Start with the toilet: replace the seat and cover if the old one is looking a little worse for wear—it’s a super inexpensive way to freshen the bathroom.
Angie’s List says don’t forget areas like underneath the sink, in the cabinets and drawers, and behind the toilet. These hard-to-reach areas may go uncleaned for a while once you move in your toiletries, so take advantage of the empty storage areas, and clean them now.
As for the shower and tub, use a grout and tile cleaner, but keep in mind that replacing the grout is an easy job that you can probably do yourself with a bit of help from your local hardware store.
Disinfect the Kitchen
Sure, wipe down the countertops, but more importantly: clean the appliances. Remove all of the stove grates and knobs, take the shelving out of the refrigerator, and set the oven to “self-clean.” Kitchens are notorious for built-up grime, so take a look at the vent hood, and replace or clean the filter. Wipe down the walls around the stove, and make sure there’s no grease or grime stuck anywhere.
Don’t forget the dishwasher: you can search the model you have online to see the best ways to clean it, but many dishwashers will have a clean setting—just pop in some dishwasher cleaning soap.
The insides of the cabinets, including the back of the doors, will need a good wipe down. Don’t forget the knobs: they collect grease from our hands and may need some special attention.
Clean the Bedrooms
The bedrooms are a little simpler: if there are built in cabinets, give everything a dust and then a wipe down. Go over the baseboards with wood cleaner, and make sure that the shelving in the closet is clean and shiny.
As for the floor, mop if it’s hardwood or laminate, and hire a carpet cleaning service if it’s carpet. If it seems relatively clean to you, you could wash the carpet yourself; just remember that the previous owners probably didn’t shampoo before they moved out, so if they had pets or kids, it’s probably a good idea to bring in the professionals.
Check out the light fixtures next: remove the covers and dust the fixtures and the bulbs. If you have ceiling fans, make sure to give them a good dusting before you turn them on, or else they’ll scatter dust throughout the room!
Clean the Living Spaces
Living areas should be treated similarly to the bedrooms, with an emphasis on that carpet cleaning step, especially for high-traffic areas. Clean the walls, and make sure there are no fingerprints left over from toddlers, or marks on busy corners.
You can buff those out by using an eraser sponge, without damaging the paint. You may even want to dust the walls (but make sure to do this before shampooing the carpet!) with a microfiber cloth. If you have tile, Moving.com suggests renting a steam cleaner.
Don’t neglect areas like sheds and garages: truth is, if you don’t clean those out, you could be looking at an annoying pest problem down the line. Make sure to sweep the floors, de-clutter the rooms, and re-seal or caulk any holes that mice may be able to burrow into. Trust us, it’s much more annoying to deal with a squirrel living in your garage than to sweep and seal the space before moving in.
If there are washing sinks or laundry machines in these spaces, clean those two: search for your washing machine and dryer models online to find out the best way to clean them, and don’t forget to pull them out from the wall and dust behind!
Moving into a new home can be overwhelming at times, but if you get the heavy lifting cleaning out of the way before move-in day, you can focus on unpacking and getting settled in. For more tips on how to clean your home the best way, check out SpongeOutlet’s blog.
When you’re ready to deep clean, pick up all of the cleaning supplies you’ll need from SpongeOutlet!
Spring may have sprung in some parts of the country, but besides warm weather and longer days, that means one thing for sure: it’s the season of the common cold!
No matter what you do on a daily basis, you’re at-risk for the common cold when the weather changes from cold to warm; when you’re out and about, there’s not much you can do to avoid it except washing your hands frequently, and staying away from other people who are sick. If someone gets sick in your home, though, then you definitely need to take a few preventative steps to keep others in your household from getting sick.
Here are some tips on what to clean at home after getting sick, to prevent your loved ones and any visitors to your home from picking up the same virus!
Clean the Usual Places After Getting Sick
High-traffic areas should be your first stop after a virus runs its course through your home. Use disinfectant spray to tackle door knobs, light switches, bedside tables, kitchen appliances, TV remotes, cell phones, and drawer pulls that you may have touched while you were contagious. Don’t forget your garbage cans: if there were lots of tissues piled up in there, your garbage can could probably use a good wipe down.
Think about where you spent most of your sick day home from work, and make sure to disinfect those areas: you might want to add your coffee table, bedside table, entertainment center, gaming consoles and anything else you used to pass your sick time, to the list.
Clean Toys After Getting Sick
If you have kids and one of them was the virus carrier, make sure to disinfect their toys and stuffed animals. Stuffed animals may be able to be machine washed, but for most toys, you’ll need to disinfect and wipe dry. Some toys can be cleaned by going in the top shelf of the dishwasher.
This can prevent your kiddo from spreading the virus to his or her friends at school, and it’ll also make other parents feel more comfortable bringing their little one by for a play date after your child has recovered.
Wash Your Bedding After Getting Sick
If you wallowed in bed for a couple of days during your cold, chances are, your sheets could use a wash. When you’re sick, you sweat more than usual, especially if you had a fever. So, once you’re cured, strip the bedding and wash everything. While your bedding tumbles dry, leave your mattress uncovered for a while so that it can air out, too. Take your vacuum cleaner stick attachment to the mattress to rid it of dust and dandruff that can aggravate colds and allergies in the future.
Wash everything in hot water and use a bit of liquid bleach if your sheets can tolerate it!
Clean Bathrooms After Getting Sick
Clean your bathroom and not just the touchpoints like the faucet. Do a deep clean of the bathroom where the sick family member spent time; wash the shower curtains, scrub the tub and the toilet, and use a disinfectant spray on the sink. Tile floors should be mopped, and any rugs or mats tossed in the washing machine.
Don’t forget the towels! Hand towels should be washed every couple of days and more frequently when someone is sick to prevent spreading the illness. In fact, it’s a good idea to designate one specific hand towel per person while someone is fighting off a cold, to be extra sure that the virus won’t pass while you’re washing your hands in the bathroom.
Use a microfiber cloth for disinfecting the bathroom and other hard surfaces, like the countertop in the kitchen: you’ll get a cleaner clean than using items like paper towels, and you can wash and re-use microfiber cloths.
Clean Your Toothbrush After Getting Sick
If you use an electric toothbrush, follow the cleaning instructions that came with the product in order to give it a deep clean. Disposable tooth brushes should be swapped out for a fresh one.
Let Fresh Air In Your House After Getting Sick
An open window will help wash out that old, stale air from your home so that everything smells fresh and clean. If it’s chilly in your neighborhood, crack the windows at night while you’re snuggled in bed: a little bit of fresh air can do wonders, but you won’t recover fully if it’s too cold inside!
Clean Your Car After Getting Sick
Don’t forget to clean your car! Your steering wheel probably has some dirt and grime on it from your cold, so use a disinfectant spray that’s safe on leather (or whatever your wheel is made of) and disinfect, along with other frequently touched areas in your car like the radio dial, gear shift, and cup holders.
Watch our video for additional car cleaning tips:
https://www.youtube.com/watch?v=ky9kpm6yaq4
If you’re careful to clean all of these areas in your home, and quit sharing water bottles and food while you’re feeling under the weather, there’s no reason to believe that anyone else will catch your cold!
It’s officially spring cleaning season, and if you’ve been meaning to get to your basement for a couple of spring seasons now, this year is the year to finally tackle it! We know that it can be hard to fit in de-cluttering and deep-cleaning your home with your busy schedule, but it’s important to make the time for these tasks as often as possible. Dust build up can irritate asthma and negatively affect the air quality of your home; plus, hoarding too much junk isn’t good for anyone.
But, there’s no doubt about it—cleaning up your basement is a huge job. If you’re not sure where to start, don’t worry: Sponge Outlet has created a basement cleaning guide for you.
Follow these steps, and you’ll have an organized, clean basement in just a couple of days.
De-Clutter and De-Junk Your Basement
The most logical place to start cleaning a basement is by getting rid of your junk. It’s also probably the most difficult item on the list, so getting it out of the way first will make the rest of the process much easier to handle.
You might want to recruit a few friends or family members to help you with this step since de-cluttering your basement is no joke.
Most people use their basement as a storage space, and if you’ve lived in your home for a while, chances are there are tons of random items piled up down there. Take your time and sort through all of your belongings. Open every box and bin, and make sure you take a good inventory of what you have.
Then, start sorting things into piles: if you’re not sure where to start, use categories like these—summer sporting goods, winter sporting goods, off-season clothing, important paperwork, miscellaneous items, and more. Depending on what’s in your basement, your piles will differ.
Once you have everything allocated to a pile, think about how you want to re-organize your basement. It’s important to put everything back in a very organized manner—otherwise, the deep clean will be for naught! You might want to take a quick trip to the hardware store or home goods store to pick up some fresh containers and a few label makers. Start putting things away in a way that makes sense to you, and make sure you clearly label all your boxes.
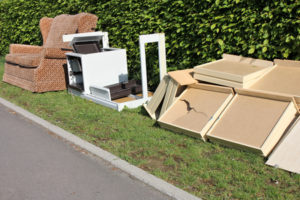
As you go, toss items that are broken and beyond repair, and make a donate pile of things you no longer need. If you haven’t used the item in the past two years, you’ll probably never need it again. If you can afford to part with it, do it! Local charities will be happy to sort through your belongings and make sure it all goes to a home that could use it.
Dust & Vacuum Your Basement
Before you start re-stacking the shelves, grab the vacuum cleaner and clean out the hard-to-reach crevices behind your shelving. If you can move furniture, do so and do a thorough vacuum of the carpet. You can’t do such a deep clean every year, but it’s important to do so occasionally.
For those of you with concrete surfaces in your basement, use warm water and detergent with a nylon brush to clean the floors. When you’re finished, use a soft mop to rinse the floors with warm water.
Get Rid of the Musty Smell in Your Basement
If your basement tends to have a musty smell, it probably needs some fresh air, a few fans, and a de-humidifier. Talk to your local hardware store about the best way to get some air flowing in your basement.
A few days of fresh air and a new set of fans, combined with a strategically placed de-humidifier, will have your basement smelling fresh in no time.
If you notice mold as you deep-clean your basement, call in the professionals. Chances are that it’s just a harmless household mold, but it could still be dangerous to you and your family. Keep your respiratory systems safe and have an expert mold removal team stop by your basement.
Prep Your Cleaning Toolbox for Your Basement
As you clean, it’s important to have a few key tools handy at all times. Start with a regular sponge to clean up messes, as well as an eraser sponge to tackle tough grease or stains. You’ll also need white vinegar, a soft cloth, dish-washing liquid, a bucket, ammonia for tough messes, a dustpan and broom, vacuum cleaner, baking soda, and kitty litter to mop up any moisture.
Don’t forget to order everything you need for the basement job right here at Sponge Outlet.
Have you ever felt like a good cleaning, top to bottom, in your house just makes you feel good? It’s true that we’re supposed to clean our homes, offices and cars regularly, but there’s more at stake than just simple presentation: cleaning is actually good for your health. In fact, the Huffington Post says that there’s a direct correlation between people who have clean homes, and people who lead active, healthy lives.
Here are a few reasons why cleaning is good for your health that just might inspire you to break out the broom and mop when you get home this evening.
Burn Calories
IndiaTimes.com says that cleaning is literally and physically good for your health because it burns calories. If you’re doing light calisthenics like vacuuming and dusting hard-to-reach places, on your feet and moving around, you can probably burn about 200 calories per hour while you vacuum. That’s not a reason to skip the gym all week, but the workout while you clean will actually contribute to making your body feel good afterwards. Exercise, after all, releases endorphins which make you feel good.
So, the next time you have to do a household task like scrubbing dishes or mopping the floor, think of it like a workout. You’ll be accomplishing two things (working out and cleaning) in the same amount of time.
Reduce Anxiety
For people who suffer from occasional anxiety, cluttered and unclean environments can sometimes heighten their emotions, leading to more stress and more unhappiness. If you make a point to regularly clean and de-clutter your space, you can actively reduce the possibility that your home environment will contribute to your anxiety levels in the future. The act of cleaning reduces stress, and a clean, clutter-free space can continue to stave off feelings of anxiety or stress that may be caused by your day-to-day life.
Improve Concentration
Cleaning and de-cluttering can also serve to enhance your ability to concentrate. This is especially important for people who work out of their homes. Messy countertops, piles of laundry, and garbage that needs to be taken out can be distracting while you’re trying to get work done. When you take care of all of that before you sit down to tackle your to-do list, you’ll end up being more focused and have an easier time concentrating on your tasks at hand.
Improve Allergy Symptoms
Many of us suffer from allergies; no matter how many times you clear off your countertop of old bills, if you’re not dusting, vacuuming and sanitizing your home, dust can still trigger allergy symptoms for you. Regularly cleaning your space and removing harmful allergens like dust and dandruff from your pets can improve your health by reducing your allergies.
Remove Harmful Bacteria
Every day, we come in contact with bacteria. On the train while we commute to work, at the office, at a restaurant, when we’re hanging out with our friends at the movies, and when our kids have a play-date at the house down the street. When we venture back into our homes at the end of a busy day, we’re bringing with us all of the bacteria we’ve come into contact with throughout the day. Sure, it’s important to wash your hands when you walk in the door, but harmful bacteria can be spread throughout your home via the soles of your shoes, your gym bag, your cell phone, and more.
Mopping your kitchen floors and your entryway isn’t just about removing stains and keeping the wood shiny and fresh, it’s also important to remove harmful bacteria that we’re tracking inside each and every day.
Some of the bacteria that we track into our homes can make us sick, so it’s important to regularly mop and disinfect your floors, wipe down your door handles, clean the tops of your counters, and make sure everything has been disinfected.
Prevent Illness
If someone in your family has a cold, cleaning your home can keep the other members of your family safe and protected from the virus that might be going around. Taking steps to prevent the spread of germs while a family member is sick is important, and starts with using disinfectant spray or wipes on high-traffic areas like door knobs, sink handles, the handles of the refrigerator, and more.
It’s important to look after the family member who is sick—but it’s equally important to make sure that your home stays clean so that the sickness isn’t spread to healthy family members.
Supplies You’ll Need
Here at SpongeOutlet, we offer everything you need to keep your home, office space and even your car clean and sanitary, so that you can maintain your good health. Click here to shop our products, and make sure to take a look at the eraser sponges, microfiber towels, regular sponges, floor pads, mops, dusters, and more. If you have any questions about our products or the materials we use to make them, give us a call today at 877-776-6430.
If you’re like most people, a clean, clutter-free workspace will allow you to be less distracted and ultimately get more done. Plus, with the office cold going around this time of year, it’s important to regularly disinfect!
But, many of us struggle to keep the desk area of our homes or offices completely neat and tidy. Here are some tips on how you can keep your desk clean, to help promote a successful, focused and germ-free workspace. Try a few of these out, and we bet you’ll start to get through your to-do list a bit faster!
Dust & De-Crumb
Chances are, the last time you gave your workspace a good, thorough cleaning (and not just a straightening up) was more than a couple of weeks ago. If you’re trying to maintain a clean, germ-free environment, regular cleaning is important. Start by creating a dusting regimen.
Every Friday evening before you leave the office (it can be Monday or Tuesday, or any day of the week that works for you), use a dust can and a microfiber cloth, to clean your workspace and rid the area of dust and crumbs from yesterday’s mid-day snack. You’ll thank us on Monday when your workspace is clean and tidy, and ready to help you tackle the week.
Magic Erase
For the areas that you touch most frequently, like the corners of your desk and the tops of your filing cabinets, take a magic eraser, to the area and gently buff away finger prints and other heavy grime. You might not think the area needs attention, but trust us, a little magic eraser will make your desk look like it’s brand new!
Disinfect
Once everything is erased, and dusted, it’s time to disinfect. Cnet says that keyboards can contain as much bacteria as a toilet seat—yuck! Unplug your keyboard and your mouse from your computer, remove any batteries that they might have, and give everything a once-over with a microfiber cloth and a bit of disinfectant spray. You can also use antibacterial wipes, or a sponge with warm water and a drop of antibacterial dish soap.
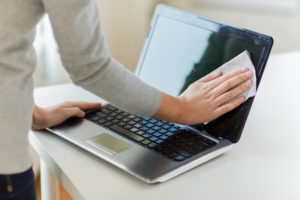
Don’t Forget: Computer Screens
Computer screens can get dusty throughout the course of the week. Gently wipe down your screens with a dry microfiber cloth, regularly. Microfiber is soft enough to remove any dust in the area without damaging your screens!
Don’t Forget: Computer Cables
Dust can also build up on your computer cables—when’s the last time you dusted everything underneath your desk? Build ups in this area can trigger asthma and allergies, and give your office and overall dingy feel. Make sure to tackle this area, every other week or once a month, with a microfiber duster.
In a Pinch: Scotch Tape
If you’ve got some leftover lunch crumbs on your desk or keyboard, but you’re out of desk dusting spray, wrap a few inches of scotch tape around your fingers, and use it to lift away pesky crumbs before depositing them in the trash.
Deep Clean: Remove the Keys
Apartment Therapy takes keyboard cleaning to the next level. How clean is it, after all, if you haven’t checked under the keys? If your keys are removable, use a small screw driver to pop them off and dust and remove crumbs and debris from underneath. Before you pop off the keys, snap a pic of how it looked before the deep clean, in case you forget where the ALT and CTL buttons belong!
Desk Phone
Do you wipe down your cell phone a few times a week? Don’t forget your office phone! It’s probably dustier than it is grimy, especially if you usually use your cell phone to make work calls, but it needs special attention nonetheless. Unplug, and use an air canister or a microfiber cloth to remove dust.
Mousepad
Spilled coffee on your mousepad lately? Flip it over to see if you can toss it in the wash; if not, use a cloth or a sponge with mild dish soap to get rid of any stains. And if it’s too far gone, consider asking your office manager to order you a new one!
Desk Calendar
If you have a calendar on your desk, there’s one thing you should know: cleaning underneath it is as important as keeping it up to date! Lift it once a week and wipe up any crumbs.
Bits & Bobs Tray
For those of you who tend to let things accumulate on your desk, a great way to keep it looking neat and tidy (and to make disinfecting a breeze) is to grab a tray from your local office supplies store to hold all your spare paperclips, business cards and push pins.
For more tips on keeping your life tidy and clean, visit our cleaning tips page. If you’re ordering cleaning supplies for an office (or like to purchase in bulk) call SpongeOutlet today at 877-776-6430.
The holidays are a time for special decorations, gifts and visitors, all of which require extra preparation and cleaning! So how can you tackle the messes around your house in time for your guests’ arrival? Follow these helpful holiday cleaning tips for the home.
Space Out Holiday Cleaning and Do It Early
To avoid feeling totally overwhelmed, try cleaning a little bit every day. You can divide up your cleaning task by the task itself, or clean an entire room a day.
wiping or cleaning surfaces (tables, countertops, appliances)
vacuuming and/or mopping
Cleaning by Room
Guest bedroom (if guests are staying overnight)
Living room/family room
Dining room
Hallway or mudroom
Kitchen
Bathroom
Using this method allows you time to do a thorough job without being rushed or left exhausted. Plus, you will have enough energy afterwards to enjoy time with your holiday guests. Before guests arrive, perform quick touch-ups such as wiping down counters and putting away items.
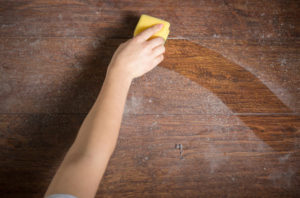
Don’t Overlook These Spots When Cleaning for the Holidays
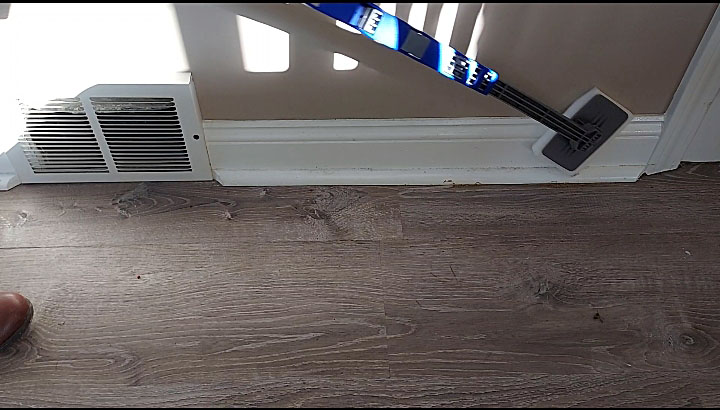
It’s easy to overlook light switches, doors and baseboards as we don’t tend to notice these items on a daily basis. Use a wet Eraser Sponge to remove scuff marks from walls and doors, fingerprints and smudges from light switches, and dirt and grime from doors. Try our Eraser Sponge Extension Handle Kit to clean your baseboards without bending. It comes with four eraser sponges that attach to the handle via Velcro.
To use,:
Wet one of the kit’s eraser sponges and squeeze out the excess water
Stick it to the end of the handle
Use the buttons on the handle to extend it to desired length
Press it firmly against a baseboard, wall, or other surface and gently move it back and forth to clean away dust, dirt, stains and dark scuff marks.
Holiday Cleaning the Entryway
Your entryway is the first thing guests will encounter when they arrive at your home, so making sure it’s spick and span will guarantee a good first impression. Wipe down your front door with our Eraser Sponge, shake out the doormat and add some festive decorations like a holiday wreath and garland. Also be sure to organize coat closets and shoe storage so everything is neat and tidy. A clean and cozy entryway is just what you need to make your guests feel welcome!
Holiday Cleaning Tips for the Kitchen
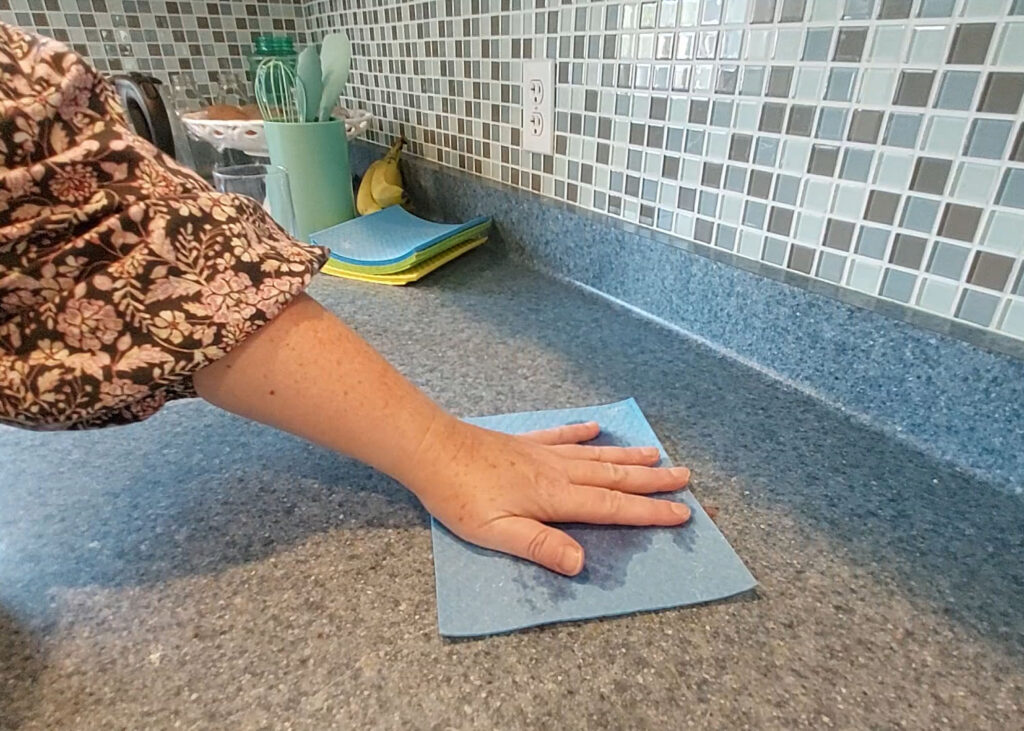
All of your delicious food will taste better in a clean oven! Mix white vinegar and baking soda together to create a foamy mixture. Let it sit on greasy spots and then use our scrubby sponge to scrub it clean. Next, declutter your countertops and wipe them down with a Swedish Dishcloth. The Swedish Dishcloth is non-scratch and safe to use on marble and granite countertops and on wood cabinets.
Preparing a Guest Bedroom
If your guests are visiting from out of town, chances are they are staying at your home for all of the holiday fun. You’ll want your guests to feel like they are in a home-away-from-home, so make sure the guest bedroom is ready with fresh sheets, towels and extra toiletry items. If you don’t remember the last time you had guests stay over, chances are there is a lot of dust in the room, so you’ll want to remove it with microfiber cloths or a microfiber duster.
Not only will your guests need a place to sleep, but they will also need somewhere to put their clothing, coats and luggage. Tackle one closet at a time and empty everything out of it. After the closet is empty, create four piles: keep, give away, throw away and store. Don’t forget the golden rule: if you can’t remember the last time you wore or used something, get rid of it!
Tips for Cleaning the Bathroom
Go through the closet and medicine cabinets and get rid of any unnecessary items. Add new towels and replenish toilet paper and hand soap so you don’t have to worry about running out when the Christmas craziness begins.
Wipe down the bathroom sink, clean the toilet and mirror. Eraser sponges are great for removing dirt and grime from shower stall floors and soap scum from glass doors and tiles. You can also use an eraser sponge to clean the sink, floor and toilet bowl.
Now your home is ready for lots of company and entertaining! For home-cleaning supplies, shop now!

 Step Two: Clean Your Bike Chain
 For more tips on cleaning items around your car, office and home,
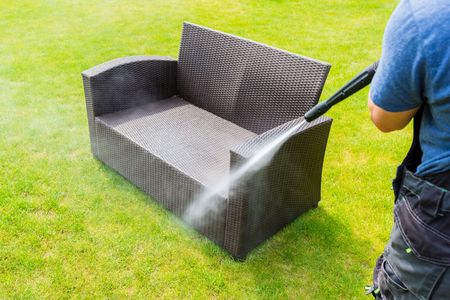

 Disinfect the Kitchen
 Wash Your Bedding After Getting Sick
 Most people use their basement as a storage space, and if you’ve lived in your home for a while, chances are there are tons of random items piled up down there. Take your time and sort through all of your belongings. Open every box and bin, and make sure you take a good inventory of what you have.
 Get Rid of the Musty Smell in Your Basement
 Prevent Illness
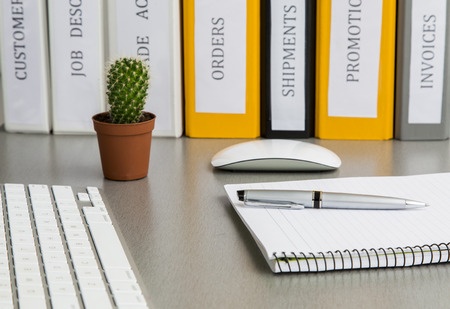
 Don’t Forget: Computer Screens