Must-Know Dusting Advice

Dusting Tips

Is dusting just about your favorite pastime? Yeah, we didn’t think so. Here at SpongeOutlet, we’re not crazy about it either, but our years of perfecting cleaning methods and products have taught us a thing or two about the right way to clean your home. And, while you may think dusting is as simple as wiping your furniture with a microfiber cloth, we’re here to tell you that you’re skipping a few steps.

Read on to learn about how to dust the most effective way, in our must-know dusting lesson.

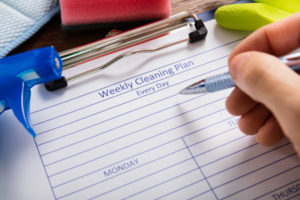
Must-Know Dusting Advice: Make a Plan

Start out by making a plan, or map of what you’ll need to dust: if you prefer lists, that works too. The reason we suggest making a plan is that dust is everywhere, and many people skip very dusty spots simply because they get distracted by other dusty spots when they get started.

  • A good rule of thumb is to dust one room at a time, and don’t just think about the surface: your bathroom, for example, may need to have its walls dusted. Moist air from your shower can cause dust to stick to the walls and baseboards with a little more sticking power than in other rooms.

Start at the top and work your way down. If you have a ceiling fan, dust that first. If you have crown molding, dust that second. Then, tackle the walls, then the furniture, and finally give the floors a good sweep. Dusting your room will upset the layers of dust on your floors and furniture, so starting up high ensures that you’re not leaving any misplaced dust behind. A strong finish with a vacuum cleaner is the best.

Must-Know Dusting Advice: Remove Everything

The first thing to do when dusting a room is to remove all of the items on the surfaces of your tables. You’ll be able to easily dust all surfaces and hard to reach areas, but remember: before you bring your stuff back into the room, make sure you give it a thorough dusting. It would be a shame to spend an hour dusting, only to re-deposit a pile of dust on your perfectly clean tabletops!

Microfiber Dusting WandsMust-Know Dusting Advice: Choose your Tools

We already mentioned a vacuum cleaner: utilize the extension tools that came with it, and don’t forget to change the settings for when you switch from carpet to hardwood. It might seem silly, but it actually makes a difference in how much stuff you pick up.

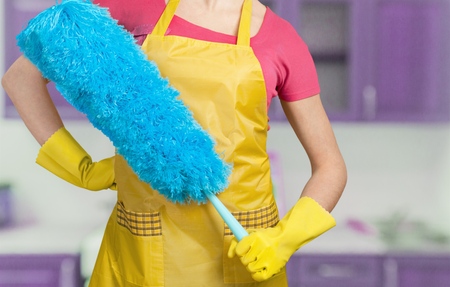
Microfiber dusting wands are a great alternative to chemical dust sprays, but those can be effective if used properly, especially on that expensive antique furniture in your living room.

  • Pro tip: if you’re not sure how best to clean a particular item of furniture, ask your local hardware store or furniture store for advice. There are different rules for different woods, as well as laminate surfaces.

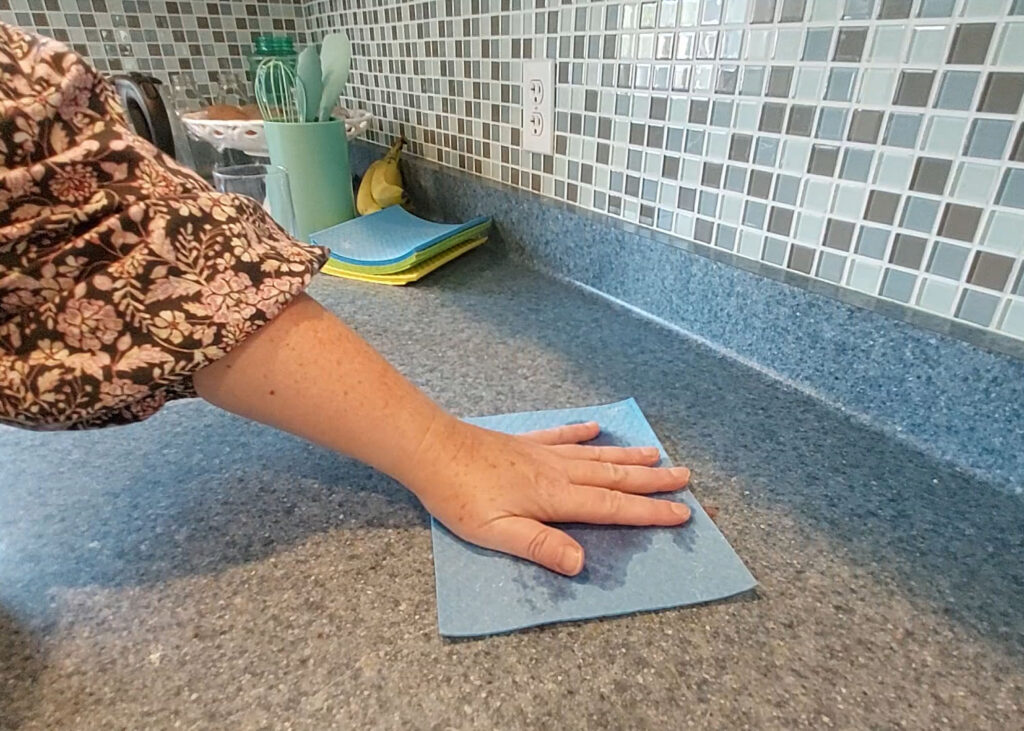
For dust that’s a bit out of hand, use a damp microfiber cloth, like the ones available from SpongeOutlet.

Must-Know Dusting Advice: Get Preventative

According to HGTV, one of the best ways to “dust” your home is to prevent the dust from accumulating in the first place. You can do this by investing in new air filters for your air conditioner and heating systems.

  • If you’re really anti-dust, you can get rid of your carpeting and opt instead for washable throw rugs. Carpet tends to trap dust, and even when it’s been properly vacuumed, it often has a bit left behind.

Decluttering your surfaces is another great way to make dusting easier: without all of those pesky nooks and crannies to tend to, dusting will be easier and more efficient, costing you less time on your weekly chore list.

Must-Know Dusting Advice: Dry to Wet

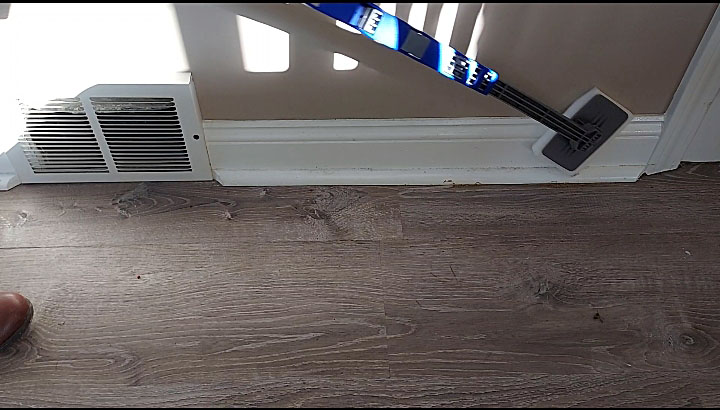
If you have hardwood or tile floors, you may be inclined to mop them regularly, but it’s important to dust them first. Use a dry mop or broom to sweep away any dust that’s on your floors, because once you turn on the water, the dust will clump and become more difficult to remove.

  • So, a good rule of thumb: always start with a dry mop, and then switch to a wet one. The same applies when you’re dusting vanities or sinks in your kitchen and bathroom.

Importance of Frequent Cleaning Must-Know Dusting Advice: Frequent Repeats

Now that you have a plan of action, the key to keeping a dust free home is to dust it frequently. You don’t have to make it an everyday chore, but at least once a week is a good rule of thumb. For households with a lot of pets and people, you may need to double or triple up.

For more cleaning tips, check out our blog, and learn about all of our products here. Happy dusting!

What to Clean at Home After Getting Sick

Spring may have sprung in some parts of the country, but besides warm weather and longer days, that means one thing for sure: it’s the season of the common cold!

No matter what you do on a daily basis, you’re at-risk for the common cold when the weather changes from cold to warm; when you’re out and about, there’s not much you can do to avoid it except washing your hands frequently, and staying away from other people who are sick. If someone gets sick in your home, though, then you definitely need to take a few preventative steps to keep others in your household from getting sick.

Here are some tips on what to clean at home after getting sick, to prevent your loved ones and any visitors to your home from picking up the same virus!

Clean the Usual Places After Getting Sick

High-traffic areas should be your first stop after a virus runs its course through your home. Use disinfectant spray to tackle door knobs, light switches, bedside tables, kitchen appliances, TV remotes, cell phones, and drawer pulls that you may have touched while you were contagious. Don’t forget your garbage cans: if there were lots of tissues piled up in there, your garbage can could probably use a good wipe down.

Think about where you spent most of your sick day home from work, and make sure to disinfect those areas: you might want to add your coffee table, bedside table, entertainment center, gaming consoles and anything else you used to pass your sick time, to the list.

Clean Toys After Getting Sick

If you have kids and one of them was the virus carrier, make sure to disinfect their toys and stuffed animals. Stuffed animals may be able to be machine washed, but for most toys, you’ll need to disinfect and wipe dry. Some toys can be cleaned by going in the top shelf of the dishwasher.

This can prevent your kiddo from spreading the virus to his or her friends at school, and it’ll also make other parents feel more comfortable bringing their little one by for a play date after your child has recovered.

Cleaning at home after getting sick Wash Your Bedding After Getting Sick

If you wallowed in bed for a couple of days during your cold, chances are, your sheets could use a wash. When you’re sick, you sweat more than usual, especially if you had a fever. So, once you’re cured, strip the bedding and wash everything. While your bedding tumbles dry, leave your mattress uncovered for a while so that it can air out, too. Take your vacuum cleaner stick attachment to the mattress to rid it of dust and dandruff that can aggravate colds and allergies in the future.

Wash everything in hot water and use a bit of liquid bleach if your sheets can tolerate it!

Clean Bathrooms After Getting Sick

Clean your bathroom and not just the touchpoints like the faucet. Do a deep clean of the bathroom where the sick family member spent time; wash the shower curtains, scrub the tub and the toilet, and use a disinfectant spray on the sink. Tile floors should be mopped, and any rugs or mats tossed in the washing machine.

Don’t forget the towels! Hand towels should be washed every couple of days and more frequently when someone is sick to prevent spreading the illness. In fact, it’s a good idea to designate one specific hand towel per person while someone is fighting off a cold, to be extra sure that the virus won’t pass while you’re washing your hands in the bathroom.

Use a microfiber cloth for disinfecting the bathroom and other hard surfaces, like the countertop in the kitchen: you’ll get a cleaner clean than using items like paper towels, and you can wash and re-use microfiber cloths.

Clean Your Toothbrush After Getting Sick

If you use an electric toothbrush, follow the cleaning instructions that came with the product in order to give it a deep clean. Disposable tooth brushes should be swapped out for a fresh one.

Let Fresh Air In Your House After Getting Sick

An open window will help wash out that old, stale air from your home so that everything smells fresh and clean. If it’s chilly in your neighborhood, crack the windows at night while you’re snuggled in bed: a little bit of fresh air can do wonders, but you won’t recover fully if it’s too cold inside!

Clean Your Car After Getting Sick

Don’t forget to clean your car! Your steering wheel probably has some dirt and grime on it from your cold, so use a disinfectant spray that’s safe on leather (or whatever your wheel is made of) and disinfect, along with other frequently touched areas in your car like the radio dial, gear shift, and cup holders.

Watch our video for additional car cleaning tips:

If you’re careful to clean all of these areas in your home, and quit sharing water bottles and food while you’re feeling under the weather, there’s no reason to believe that anyone else will catch your cold!

For more cleaning tips, head over to the Sponge Outlet’s blog, and pick up a few of our essential cleaning supplies, like our eraser sponge, today.

Fully Clean Your Basement With This Guide

It’s officially spring cleaning season, and if you’ve been meaning to get to your basement for a couple of spring seasons now, this year is the year to finally tackle it! We know that it can be hard to fit in de-cluttering and deep-cleaning your home with your busy schedule, but it’s important to make the time for these tasks as often as possible. Dust build up can irritate asthma and negatively affect the air quality of your home; plus, hoarding too much junk isn’t good for anyone.

But, there’s no doubt about it—cleaning up your basement is a huge job. If you’re not sure where to start, don’t worry: Sponge Outlet has created a basement cleaning guide for you.

Follow these steps, and you’ll have an organized, clean basement in just a couple of days.

De-Clutter and De-Junk Your Basement

The most logical place to start cleaning a basement is by getting rid of your junk. It’s also probably the most difficult item on the list, so getting it out of the way first will make the rest of the process much easier to handle.

  • You might want to recruit a few friends or family members to help you with this step since de-cluttering your basement is no joke.

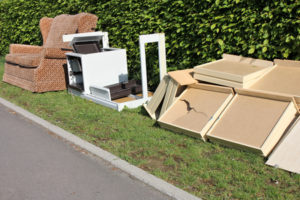
Most people use their basement as a storage space, and if you’ve lived in your home for a while, chances are there are tons of random items piled up down there. Take your time and sort through all of your belongings. Open every box and bin, and make sure you take a good inventory of what you have.

  • Then, start sorting things into piles: if you’re not sure where to start, use categories like these—summer sporting goods, winter sporting goods, off-season clothing, important paperwork, miscellaneous items, and more. Depending on what’s in your basement, your piles will differ.

Once you have everything allocated to a pile, think about how you want to re-organize your basement. It’s important to put everything back in a very organized manner—otherwise, the deep clean will be for naught! You might want to take a quick trip to the hardware store or home goods store to pick up some fresh containers and a few label makers. Start putting things away in a way that makes sense to you, and make sure you clearly label all your boxes.

  • As you go, toss items that are broken and beyond repair, and make a donate pile of things you no longer need. If you haven’t used the item in the past two years, you’ll probably never need it again. If you can afford to part with it, do it! Local charities will be happy to sort through your belongings and make sure it all goes to a home that could use it.

Dust & Vacuum Your Basement

Before you start re-stacking the shelves, grab the vacuum cleaner and clean out the hard-to-reach crevices behind your shelving. If you can move furniture, do so and do a thorough vacuum of the carpet. You can’t do such a deep clean every year, but it’s important to do so occasionally.

  • For those of you with concrete surfaces in your basement, use warm water and detergent with a nylon brush to clean the floors. When you’re finished, use a soft mop to rinse the floors with warm water.

Tips for Cleaning Your BasementGet Rid of the Musty Smell in Your Basement

If your basement tends to have a musty smell, it probably needs some fresh air, a few fans, and a de-humidifier. Talk to your local hardware store about the best way to get some air flowing in your basement.

  • A few days of fresh air and a new set of fans, combined with a strategically placed de-humidifier, will have your basement smelling fresh in no time.

If you notice mold as you deep-clean your basement, call in the professionals. Chances are that it’s just a harmless household mold, but it could still be dangerous to you and your family. Keep your respiratory systems safe and have an expert mold removal team stop by your basement.

Prep Your Cleaning Toolbox for Your Basement

As you clean, it’s important to have a few key tools handy at all times. Start with a regular sponge to clean up messes, as well as an eraser sponge to tackle tough grease or stains. You’ll also need white vinegar, a soft cloth, dish-washing liquid, a bucket, ammonia for tough messes, a dustpan and broom, vacuum cleaner, baking soda, and kitty litter to mop up any moisture.

Don’t forget to order everything you need for the basement job right here at Sponge Outlet.

Five Spring Cleaning Tips

Helpful Spring Cleaning Tips

Spring is in the air! Which means, it’s time to put away your heavy winter coats, and bring the spring wardrobe out of the closet. And, that means it’s time to do some serious spring cleaning.

Doing a deep-clean of your home once a year is important. It prevents dirt built up on your floors and tile, and also gives you a chance to clean places that you typically leave alone during a normal clean. Plus, it’s a great time to de-clutter your home and get rid of things you haven’t used in the last 12 months or so.

Read on for some spring cleaning tips you won’t want to miss.

We’ll help you keep your spring cleaning to-do list manageable, so you can get your home in tip top shape and can enjoy the spring season.

Spring Cleaning Tip 1: Get Organized

No one likes to be cooped up inside all day vacuuming when the weather is nice, so it’s important to get organized about your spring cleaning and get ahead of it: the more you plan and organize, the less time you’ll waste, so you can get back to your regularly scheduled spring programming in no time.

Make a list of all of the items you want to tackle this spring-cleaning season. Suggestions from House Beautiful include cabinets, windows, the inside of your dishwasher, your fridge shelves, silverware, oven, wood floors, carpet, storage areas, pantry, washing machine, mattress, painted walls, bookshelves, and outdoor furniture.

Spring Cleaning Tip 2: De-Clutter

Helpful Spring Cleaning Tips 
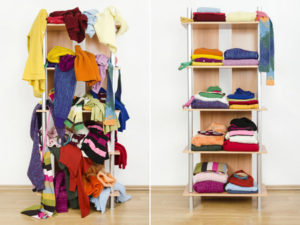
The best thing to do first when spring cleaning is to de-clutter. Take everything out of your closets, first. Get rid of winter clothing that you didn’t wear this season or last season, and pare down by getting rid of anything you don’t love anymore. Make sure you donate clothing that’s still in good shape to your local Good Will or charity.

Make a pile of shoes you need to get repaired, and call around local shoe repair shops to get the best price. You should also wash or dry clean your winter coats before packing them away for the spring and summer season when you won’t need them.

In the kitchen, take everything out of your pantry and throw away any items that are expired. Don’t forget to check your spice cabinet, too—if you don’t cook frequently, some of those spice bottles may be too old to use!

Wipe out the cabinets and vacuum the bottom of your closet before putting everything away.

Spring Cleaning Tip 3: Visit the Outside of Your House

Choose an overcast day to tackle the outside of your home. Wash the windows (inside and outside), and dust and clean the porch furniture that’s been sitting in your garage all winter. If you need to do some mild landscaping before the spring hits, get that out of the way too.

Use your garden hose to get rid of spider webs or built up dirt on the siding of the house, and if you need to, rent a power washer from your local hardware store to get pollen build up off the side of your home.

Sweep the porch and the deck, clean your welcome mats, and get everything set up for the spring!

Spring Cleaning Tip 4: Tackle the Inside of Your House

Helpful Spring Cleaning Tips Take it one room at a time in the interior of your home, and plan to split this process up over a few days; getting everything done all at once won’t work!

Take down all of the curtains and wash them to remove dust and any other build up. Dust everything! Don’t forget places like the back part of your bookshelves, ceiling fans, sconces, baseboards, night stands, coffee tables, and any other surface that collects dust.

If you have a pet, use the attachment on your vacuum cleaner to get rid of hair and fur on your upholstered surfaces, including your headboard, couches and chairs.

Vacuum and shampoo the carpeting in each room, moving your furniture as you go so that you clean the entire carpet rather than just the traffic areas.

Good Housekeeping says you shouldn’t forget to vacuum your mattress! Use the crevice tool on your vacuum to remove dust from your mattress.

Clean the kitchen next: wipe down your cabinets—if they’re wood, use a wood cleanser so that you don’t dry them out. Clean your appliances, including your oven, microwave and dishwasher, and use vinegar to deep-clean your stainless-steel pots and pans. Don’t forget the fridge: remove all of your food, toss out expired items, and use a disinfectant spray to wipe down the shelves. You may be able to remove them and pop them in the dishwasher.

Spring Cleaning Tip 5: Pay Attention to Your Walls

Your walls can build up with grime from fingertips and other grease, so use an eraser sponge, like the ones we offer here at SpongeOutlet, to freshen up areas around door knobs, light switches, highly trafficked corners, and more.

Spring cleaning doesn’t have to be overwhelming: follow these tips, and stock up on cleaning supplies from SpongeOutlet before you dive in. If you stay organized and stick to a schedule, your home will be cleaner than ever in just a few days!


Why Cleaning is Good for Your Health

Have you ever felt like a good cleaning, top to bottom, in your house just makes you feel good? It’s true that we’re supposed to clean our homes, offices and cars regularly, but there’s more at stake than just simple presentation: cleaning is actually good for your health. In fact, the Huffington Post says that there’s a direct correlation between people who have clean homes, and people who lead active, healthy lives.

Here are a few reasons why cleaning is good for your health that just might inspire you to break out the broom and mop when you get home this evening.

Burn Calories

IndiaTimes.com says that cleaning is literally and physically good for your health because it burns calories. If you’re doing light calisthenics like vacuuming and dusting hard-to-reach places, on your feet and moving around, you can probably burn about 200 calories per hour while you vacuum. That’s not a reason to skip the gym all week, but the workout while you clean will actually contribute to making your body feel good afterwards. Exercise, after all, releases endorphins which make you feel good.

So, the next time you have to do a household task like scrubbing dishes or mopping the floor, think of it like a workout. You’ll be accomplishing two things (working out and cleaning) in the same amount of time.

Reduce Anxiety

For people who suffer from occasional anxiety, cluttered and unclean environments can sometimes heighten their emotions, leading to more stress and more unhappiness. If you make a point to regularly clean and de-clutter your space, you can actively reduce the possibility that your home environment will contribute to your anxiety levels in the future. The act of cleaning reduces stress, and a clean, clutter-free space can continue to stave off feelings of anxiety or stress that may be caused by your day-to-day life.

Improve ConcentrationWhy Cleaning is Good for Your Health

Cleaning and de-cluttering can also serve to enhance your ability to concentrate. This is especially important for people who work out of their homes. Messy countertops, piles of laundry, and garbage that needs to be taken out can be distracting while you’re trying to get work done. When you take care of all of that before you sit down to tackle your to-do list, you’ll end up being more focused and have an easier time concentrating on your tasks at hand.

Improve Allergy Symptoms

Many of us suffer from allergies; no matter how many times you clear off your countertop of old bills, if you’re not dusting, vacuuming and sanitizing your home, dust can still trigger allergy symptoms for you. Regularly cleaning your space and removing harmful allergens like dust and dandruff from your pets can improve your health by reducing your allergies.

Remove Harmful Bacteria

Every day, we come in contact with bacteria. On the train while we commute to work, at the office, at a restaurant, when we’re hanging out with our friends at the movies, and when our kids have a play-date at the house down the street. When we venture back into our homes at the end of a busy day, we’re bringing with us all of the bacteria we’ve come into contact with throughout the day. Sure, it’s important to wash your hands when you walk in the door, but harmful bacteria can be spread throughout your home via the soles of your shoes, your gym bag, your cell phone, and more.

Mopping your kitchen floors and your entryway isn’t just about removing stains and keeping the wood shiny and fresh, it’s also important to remove harmful bacteria that we’re tracking inside each and every day.

Some of the bacteria that we track into our homes can make us sick, so it’s important to regularly mop and disinfect your floors, wipe down your door handles, clean the tops of your counters, and make sure everything has been disinfected.

Why Cleaning is Good for Your HealthPrevent Illness

If someone in your family has a cold, cleaning your home can keep the other members of your family safe and protected from the virus that might be going around. Taking steps to prevent the spread of germs while a family member is sick is important, and starts with using disinfectant spray or wipes on high-traffic areas like door knobs, sink handles, the handles of the refrigerator, and more.

It’s important to look after the family member who is sick—but it’s equally important to make sure that your home stays clean so that the sickness isn’t spread to healthy family members.

Supplies You’ll Need

Here at SpongeOutlet, we offer everything you need to keep your home, office space and even your car clean and sanitary, so that you can maintain your good health. Click here to shop our products, and make sure to take a look at the eraser sponges, microfiber towels, regular sponges, floor pads, mops, dusters, and more. If you have any questions about our products or the materials we use to make them, give us a call today at 877-776-6430.

Holiday Cleaning Tips for the Home

The holidays are a time for special decorations, gifts and visitors, all of which require extra preparation and cleaning! So how can you tackle the messes around your house in time for your guests’ arrival? Follow these helpful holiday cleaning tips for the home.

Space Out Holiday Cleaning and Do It Early

To avoid feeling totally overwhelmed, try cleaning a little bit every day. You can divide up your cleaning task by the task itself, or clean an entire room a day.

Individual tasks:

  • decluttering
  • storage organization (closets, cabinets, refrigerator)
  • dusting
  • washing windows
  • wiping or cleaning surfaces (tables, countertops, appliances)
  • vacuuming and/or mopping

Cleaning by Room

  • Guest bedroom (if guests are staying overnight)
  • Living room/family room
  • Dining room
  • Hallway or mudroom
  • Kitchen
  • Bathroom

Using this method allows you time to do a thorough job without being rushed or left exhausted. Plus, you will have enough energy afterwards to enjoy time with your holiday guests. Before guests arrive, perform quick touch-ups such as wiping down counters and putting away items.

Holiday Cleaning Tips Don't forget the baseboards

Don’t Overlook These Spots When Cleaning for the Holidays

It’s easy to overlook light switches, doors and baseboards as we don’t tend to notice these items on a daily basis. Use a wet Eraser Sponge to remove scuff marks from walls and doors, fingerprints and smudges from light switches, and  dirt and grime from doors. Try our Eraser Sponge Extension Handle Kit to clean your baseboards without bending. It comes with four eraser sponges that attach to the handle via Velcro.

To use,:

  • Wet one of the kit’s eraser sponges and squeeze out the excess water
  • Stick it to the end of the handle
  • Use the buttons on the handle to extend it to desired length
  • Press it firmly against a baseboard, wall, or other surface and gently move it back and forth to clean away dust, dirt, stains and dark scuff marks.

Holiday Cleaning the Entryway

Your entryway is the first thing guests will encounter when they arrive at your home, so making sure it’s spick and span will guarantee a good first impression. Wipe down your front door with our Eraser Sponge, shake out the doormat and add some festive decorations like a holiday wreath and garland. Also be sure to organize coat closets and shoe storage so everything is neat and tidy. A clean and cozy entryway is just what you need to make your guests feel welcome!

Holiday Cleaning Tips: Scrub and wipe down counters

Holiday Cleaning Tips for the Kitchen

All of your delicious food will taste better in a clean oven! Mix white vinegar and baking soda together to create a foamy mixture. Let it sit on greasy spots and then use our scrubby sponge to scrub it clean. Next, declutter your countertops and wipe them down with a Swedish Dishcloth.  The Swedish Dishcloth is non-scratch and safe to use on marble and granite countertops and on wood cabinets.

Preparing a Guest Bedroom

If your guests are visiting from out of town, chances are they are staying at your home for all of the holiday fun. You’ll want your guests to feel like they are in a home-away-from-home, so make sure the guest bedroom is ready with fresh sheets, towels and extra toiletry items. If you don’t remember the last time you had guests stay over, chances are there is a lot of dust in the room, so you’ll want to remove it with microfiber cloths or a microfiber duster.

Not only will your guests need a place to sleep, but they will also need somewhere to put their clothing, coats and luggage. Tackle one closet at a time and empty everything out of it. After the closet is empty, create four piles: keep, give away, throw away and store. Don’t forget the golden rule: if you can’t remember the last time you wore or used something, get rid of it!

Tips for Cleaning the Bathroom

Go through the closet and medicine cabinets and get rid of any unnecessary items. Add  new towels and replenish toilet paper and hand soap so you don’t have to worry about running out when the Christmas craziness begins.

Wipe down the bathroom sink, clean the toilet and mirror. Eraser sponges are great for removing dirt and grime from shower stall floors and soap scum from glass doors and tiles. You can also use an eraser sponge to clean the sink, floor and toilet bowl.

Now your home is ready for lots of company and entertaining! For home-cleaning supplies, shop now!

How to Remove Salt Stains This Winter

Salt can really work wonders in the winter. It can prevent snow from building up on sidewalks and driveways and make roads significantly safer than they would be otherwise. But salt can also wreak havoc on everything from your car to your clothing to the floors inside of your home. To stop salt from becoming a problem, you should remove winter salt stains from these items as soon as you see them. Take a look at how to remove salt stains below.

How to Remove Salt Stains From Your Car

Salt stains on your vehicle will make it look very unattractive. Salt could also potentially cause extensive damage to your vehicle’s paint job if it’s not removed. To get salt stains off of your vehicle, you should take a microfiber towel and dip it into a mixture of water and vinegar before using it to wipe away stains. Microfiber towels are durable enough to get tough stains out but also gentle enough to prevent scratches from showing up on your car.

How to Remove Salt Stains From Your Clothing

During the winter, you should try to wear weather-resistant clothing and shoes. When you do, you will be able to remove salt stains with little more than a microfiber towel and a water/vinegar mix. You can also use an Eraser Sponge with a little bit of water to get the job done. Clothing and footwear that aren’t weather-resistant can be trickier. You will usually have to let the salt dry before wiping it away with a brush, but you should be sure not to let it sit too long since it could damage your clothing or shoes over time.

How to Remove Salt Stains From Your Flooring

Salt can do a lot of damage to flooring in a relatively short period of time. Hardwood floors, in particular, can absorb salt water and show signs of damage quickly. To stop this from happening, you can use a microfiber towel to wipe up any excess salt or salt water that pools on your floor. You can also use an Eraser Sponge to spot treat any stains that set in, especially if you have a tile or linoleum floor. But the key is to get flooring dry right away whenever it’s exposed to salt or salt water from outside.

Spongeoutlet.com has the products you need to get rid of winter salt stains. From a wide range of Eraser Sponge options to big packs of microfiber towels, we can provide you with exactly what you need to prevent salt from causing you problems. Call us at 877-776-6430 today to place an order!

How an Eraser Sponge Can Help Clean Up After Your Pet

How an Eraser Sponge Can Clean Up After Your Pet

Since we have been on the cleaning kick lately, we thought we would address cleaning up after your pet, especially with winter quickly approaching. We all love our pets and we want them to have fun, but sometimes that means having a mess to clean up on a daily basis.

Our pets daily activities often cause scuffs on the floors and marks on the walls, cabinets and doors. Dogs and cats also tend to make a mess around their food and water bowls and there are occasional accidents when we have been at work too long, or a misstep with the litter box that can leave a mess on the floor.

The eraser sponge is the perfect cleaning tool for homes with pets.

Instead of filling a bucket with water and soap and wetting a mop to wipe up the floors, an eraser sponge makes it easy to clean up spills, scuffs and dirty paw prints in a snap. An eraser sponge is simple enough for your children to use as well if you need the extra help! It’s much simpler and cheaper to teach your little ones how to help you tidy up after pets by using the eraser sponge.

Keep your eraser sponges handy and have your children watch you clean up the scuffs and marks left by your pets and encourage them to join you. After going through the simple process a few times, your kids will automatically reach for the eraser sponge when your dog comes in from outside with muddy paws.

An eraser sponge is your all-purpose cleaning tool for homes with pets. You will no longer need to struggle with the mess of a mop. Make the clean-up process easier and quicker so you can spend more time with your pets and children! For more essential cleaning supplies, visit Spongeoutlet today!

Paint Your Walls After Cleaning

In our previous blog post, we talked about steps to take so your walls look spotless. Now, we are going to talk about choosing the right paint and finish for your walls to help them look even better. Whether you have recently moved into a new home or are looking to update your current abode, a fresh coat of paint is one of the best ways to re-envision your homes appearance.

A new paint color can do wonders for updating the feel of your home, but for families with young children and pets, keeping your walls clean can seem like an impossible task. So you know you should paint your walls, but with so many colors and finishes to choose from, how do you know what will hold up the best to daily wear?

Focus on light colors

Many people make the mistake of choosing neutral wall colors just because they are good at hiding dirty handprints, but there are plenty of other options you can look at. Try to stick to pale hues and midtones. Colors like dark reds, blues and purples will actually show wear much more quickly than their lighter counterparts, burnishing in spots where your pets and children rub against them.

Choose the right finish

After choosing the right color, you’ll have to choose a paint finish which can also be overwhelming. If you don’t like the look of the shiny appearance of semi-gloss and hi-gloss enamel paint, try an eggshell finish. This is a durable and less reflective finish that is easy to clean. Eggshell will hold up well against dirt and grime your children may coat it with throughout the years.

Don’t forget to clean with your eraser sponge

Although we hope that your newly painted walls stay clean and fresh looking for a long time, accidents do happen. Whether it’s play dough stains, marker or beverage stains that ended up on the walls, the eraser sponge is tough enough to get the job done but gentle enough not to damage your paint’s finish! Visit Spongeoutlet or call 877-776-6430 to place your order today!

Why You Shouldn’t DIY Eraser Sponges

When it comes to household cleaning, most homeowners can agree that eraser sponges are a staple. People swear by them since they can get almost anything out of any surface, there is very little that an eraser sponge cannot do! Although eraser sponges are easy enough to obtain, people are always looking for homemade solutions, especially since DIY crafts are trending.

However some things, like an eraser sponge, cannot be replicated.

Regardless, people still try and you may see DIY eraser sponge tutorials on Pinterest or Youtube. The tutorials claim that eraser sponges will get stains out of walls, floors and surfaces which sounds great, however the DIY substance that you make based off of a strangers advice is likely to make an even bigger mess!

The material used in DIY is referred to as Melamine Foam. This foam is an efficient tool for removing stains and it’s easy enough to get the material, but executing the creation of a quality eraser sponge is much more difficult than a DIY project.

Trying to DIY with this project just isn’t worth the possible outcomes.

Instead of attempting to make your own eraser sponge, make it easier on yourself and order from Spongeoutlet!  We are the leading online distributor of bulk melamine eraser sponges, microfiber towels, dusters, mops and other essential cleaning supplies. Contact us today by calling 877-776-6430 or browse our products online.