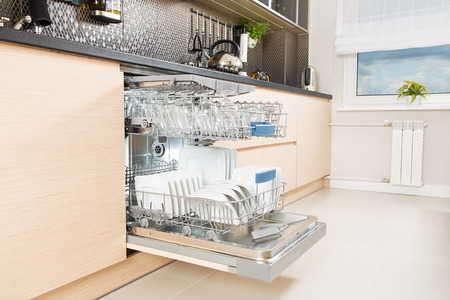
Your dishwasher is one of the hardest working appliances in your kitchen, considering it cleans the grime and food off your dishware. It makes sure your dishes, glasses, silverware, and cooking accessories are sparkly clean. Keeping it clean and well-maintained will help get dishes as clean as possible and also extend the life of the appliance.
Clean the Gasket Seal Around the Dishwasher Tub
The plastic or rubber-like seal around a dishwasher tub helps to secure it and prevent any water leakage. Over time, the seal can become dirty and possibly smell. Use an eraser sponge to remove any dirt, grime or food particles from the seal. Check the racks and the silverware basket to make sure they are clean as well. Over time, dirt can build-up and food particles can become trapped, especially inside the basket. Some silverware baskets are removable and can be cleaned in the sink. An eraser sponge can also help remove dirt and grime from racks and the basket.
Remove and Clean the Dishwasher Filter
Check the bottom of the rack or consult your owner’s manual to see if there is a removable filter that should be cleaned. Many newer-models of dishwasher have a filter that can be removed and washed out in the sink. The filter traps food and other foreign objects from being sucked into the dishwasher pump and damaging or clogging it. To clean any filters, pull out the bottom rack and check for a removable filter. You may also have protective caging at the bottom of your dishwasher that is removable as well. Unsnap it and rinse it off in the sink with a sponge. Snap the caging or replace the filter back into place once it is clean.
Run a Cleaning Cycle
Many modern dishwashers have a cleaning cycle that can be run to clean the inside of the dishwasher. Use a commercial dishwasher cleaner, or else place a cup of plain white vinegar in the top rack of the dishwasher and run a normal cycle. Some blogs suggest using bleach to clean your dishwasher, however if the inside of your dishwasher is stainless steel this can lead to corrosion and damage. As ever, follow the manufacturer’s instructions to extend the life of your dishwasher and minimize maintenance.
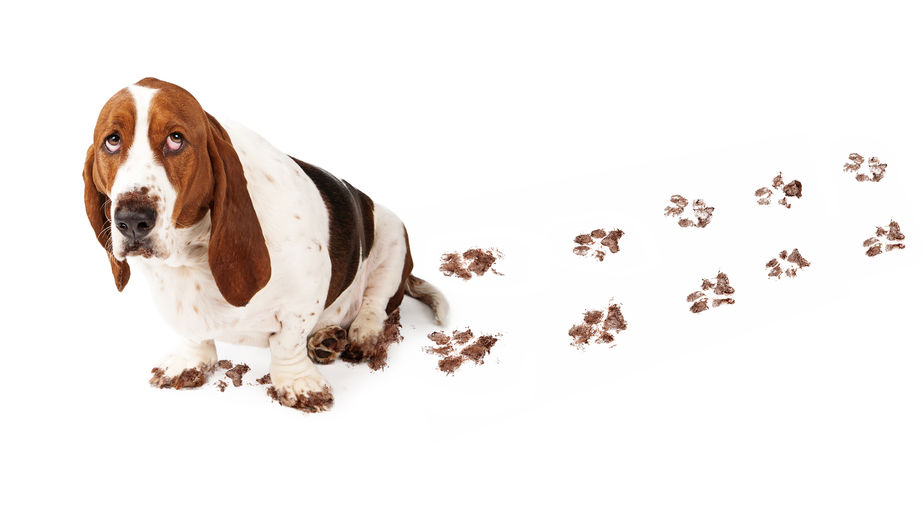
Having a pet as a member of your family is truly a great experience, but there comes a price with it like everything else. Cleaning up after your pet can be annoying because it’s usually a common occurrence. Whether it’s cleaning up their eating area or cleaning up an accident they had in the house, an eraser sponge is the way to go.
Why the Eraser Sponge?
As parents of animals, we don’t always have the time to grab a bucket, fill it with water, and wet a mop, to wipe up floors; or time to get down on our knees with a bucket full of water and a sponge to clean up scuffed cabinet doors. The eraser sponge makes it easy to clean up spills, scuffs, and dirty paw prints in a snap. Also, it is simple to use for cleanup, so you can show your kids how to clean with it. The eraser sponges from Sponge Outlet are strong enough to use on almost any grit, grime or dirt without compromising your counter-tops, walls, floors or other surfaces.
Giving a small child a mop and bucket of water can create even more of a mess than the one you were attempting to clean.
Keep the eraser sponges handy, and have your kids watch you clean up scuffs and marks left by your pets; then engage them in the activity with you.
After using this technique, your kids will be able to always clean up after your pet makes some kind of a mess. An eraser sponge is your all-purpose cleaning tool for households with pets. You won’t need to switch up from a sponge to a mop.
You can clean all your pet’s messes with the eraser sponge; making the clean-up process easier and quicker. Now you can get back to the other tasks on your to-do-lists.
If you’re looking for an easier way to clean up after your pet’s mess, contact Sponge Outlet at 877-776-6430to find out more on our eraser sponges and how they can help with pet messes.
Cleaning out your microwave is never a fun job to do, but sometimes we forget to put that paper towel over the food we are re-heating and the result is some splatter on the walls of the microwave. We even sometimes put off cleaning it up because we say we’ll clean it the next day. But in reality, this usually gets put off for a week or two, and it becomes the dirtiest place in the kitchen. No one wants to heat up food in the microwave if it’s dirty.
A Dirty Microwave Can Cause Health Issues
We should be cleaning our microwave after each time we use it but most of us don’t. Sponge Outlet’seraser sponges are the perfect tool to use to clean out a dirty microwave. Using our eraser sponge, scrub out any food splatters from walls, rotating tray, and door. This will help get all of the tough spots cleared out first. Some food may be hard to remove but the eraser sponge can handle tough grit, grime, and dirt.
After, Steam Clean the Microwave
Using a microwave-safe bowl, vinegar, water, and a sponge, you can get your microwave looking brand new. Pour an equal amount of water and vinegar into a bowl, usually half a cup of each works well.
Put a toothpick into the solution before you start. You’ll notice that bubbles form on the toothpick allowing it to boil without exploding.
Leave the bowl in your microwave for about 5 to 10 minutes depending on how dirty it is. When the minutes are over, let the microwave stand with the door closed for several minutes allowing steam to penetrate the microwave.
Be sure to have oven mitts on hand in order to take the bowl out which will be extremely hot.
After you remove the bowl, stick the eraser sponge into the bowl when the solution is still hot and scrub the rest of your microwave.
Make sure you wipe down corners, windows, walls, and the outside of the microwave as well.
Our eraser sponges are also disposable so once it cools down, it can be thrown out. Visit Sponge Outlet or call 877-776-6430 to find out about more of our cleaning products!
Dust is relentless and causes every homeowner to get annoyed every single time it comes back around. If you let it go for too long, you will get even more stressed out. It’s just another thing you have to think about when it comes to cleaning your home. This will make the home look unkempt and can be unhealthy for those with allergy issues, so it’s very important to take care of the issue right away and on a regular basis. We want you to give you some tips on managing the dust in your home.
Dusting Tools
Choosing the right dusting tool is a key factor to making dusting your home easier. Microfiber dusting wands are the best option to gather all those hidden particles, and they are also quite affordable to purchase in bulk.
With microfiber dusting cloths, you won’t need harsh chemicals or sprays
If you have kids or pets, you may want to avoid using harsh dusting sprays and chemicals. With a microfiber cleaning cloth, you are able to dust your entire home without the use of any of these products. This is another way the microfiber dusting wand saves you money and helps you to create a healthier home environment for your family.
Clean the Floors
It is smart to save the floors for last. After dusting all the high areas in the home; work your way down to the floor, so that the dust fallen from the furniture will fall onto the floors before you clean them. If you have tile floors, it is best to vacuum and mop.
If you’re looking to get good cleaning products for your home, contact Sponge Outlet at 877-776-6430, and we can provide you with a plethora of different cleaning products for whatever your needs are.
Summer is finally approaching after your boat spent all winter in storage waiting for sun and warm weather to appear. It’s time to get your boat back on the water, and there are some things that need to be done before you take it out for the start of the season.
Do a Maintenance Check
Before gathering the family and jumping in the boat for a fun-filled day on the water, you should conduct a simple checkup on your boat to ensure everything is working properly and the supplies are stocked. Here is a checklist:
Check the fuel and hoses for leaks or cracks
Check the cables and belts
Inspect electrical connections
Check the engine oil and coolant fluid
Stock with life jackets and first aid kit
These simple tasks can help you have a very enjoyable summer season on your boat. If you put these things off, your summer may be stressful and costly.
Make Sure to Clean
After inspecting the boat and making sure everything is in order, it’s time to clean the boat’s interior and exterior. To help remove musty odors and to preserve the value of your boat, you should really take the time and clean it. Grab your kids or grand kids and have them help you! It can be an easy and simple process if you use these products from Sponge Outlet.
The Super S Detail Sponge is perfect for big jobs such as cleaning your boat. Simply wet the sponge, squeeze out any excess water and gently rub the dirt, stain, scuff or even mold mark on your boat. Rinse, squeeze and store the sponge so you can reuse it many times.
Use our Large Shammy Cloth to clean up spills fast. The Shammy is both a sponge and a towel and can wash, dry and polish your boat without leaving any scratches. You’ll be able to throw this in the washing machine after and use this next year as well.
If you are planning on cleaning your boat before putting it in the water this summer, take a look at Sponge Outlet’s auto and boat cleaning products and get started today! Call us at 877-776-6430!
Mold is the last thing you want to find inside of your home. Mold can grow in plenty of conditions, so if your home is the right blend of warm and moist, you may be at-risk.
But not to worry. If you have mold, you can get rid of it by taking a few key preventative steps and removing it completely from the areas inside your home that are affected.
Read on to learn about ways to remove mold from walls so you can avoid replacing the interior of your home!
Step 1: Identify the mold
The first thing you’ll need to do when you suspect that there’s mold in your home is identify what kind of mold you’re dealing with. Some molds can be very detrimental to your health, while others are not so harmful, so it’s important to take the proper precautions.
Mold can grow anywhere, but you’ll most often find a version of it called mildew in your shower tile grout lines, other areas in damp bathrooms, and walls that had recently been wet due to a leak. To see if you’re dealing with mildew, test a small area by placing a few drops of bleach. If the bleach lightens up the dark spots, then you’re dealing with mildew. If it stays black, you probably have something else—like dirt!
Other molds, or mold in a high concentration, will give off a musty odor. If you can smell something funky, but can’t see what you’re dealing with, it might be a good idea to bring in a professional. Mold can be tricky to remove, even in the best of circumstances, and if you can’t see the mold, it’s probably burrowed in your walls.
Black mold is also something that you shouldn’t attempt to remove—let the professionals deal with it.
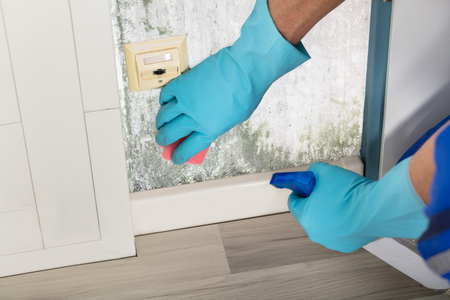
Step 2: Remove the mold
Once you’ve identified that you have an area of your home that needs to be cleaned and rid of mold, you’ll need to gather your supplies. Remove any furniture from the area that needs to be treated, and put on a pair of rubber gloves, goggles and a mask to protect yourself. You’ll also want to wear old clothing that you won’t mind bleaching or tossing when the task is done.
Home Guides says to mix 3 parts warm water to 1 part detergent in a spray bottle. Spray the solution on the moldy areas of the wall, and scrub with a towel. Keep in mind that wire brushes may damage your drywall. Once all areas have been washed, use a clean spray bottle to apply water and wipe the area dry.
Next, mix a solution of 1 part bleach to 2 parts water. Spray the mixture on the affected areas, and let it sit for 10 minutes. Then, rinse with the water-only spray bottle. Dry with a clean cloth or rag, and discard of any used towels or rags in a tightly sealed garbage bag.
If these steps don’t work, or you prefer to not use bleach in your home, you can try to remove the mold with a vinegar mixture.
Spray the mold with vinegar and let it sit for 1-2 hours. Afterwards, mix baking soda and water to form a paste, and use this paste to scrub the affected areas of your wall. Rinse with clean water when you’re finished.
Step 3: Repaint the mold areas
Unfortunately, removing mold can be a bit of a messy business, so chances are you’ll need to re-paint your walls once the mold has been taken care of. The bleach and the scrubbing won’t be kind to your paint job, so plan for a re-paint. If your walls are still dark and stained from the mold, ask your local hardware store about a primer that will cover up those stains.
Step 4: Prevent mold
Antimicrobial sprays can be used to prevent mold in your home. Or, you can pick up an anti-mildew paint from your hardware store.
In areas that are often subject to heat and humidity, consider installing a de-humidifier to pull excess moisture from the air and prevent mold growth. Keep everything as well-ventilated as possible.
Pick up your mold-removal supplies for your home right here at Sponge Outlet. Our microfiber cloths are great for wiping down walls and other affected areas, and our eraser sponges are great for treating tough stains caused my mildew. For more tips and tricks to keep your home clean, head to our blog! Need help placing an order? Call us at 877-776-6430.
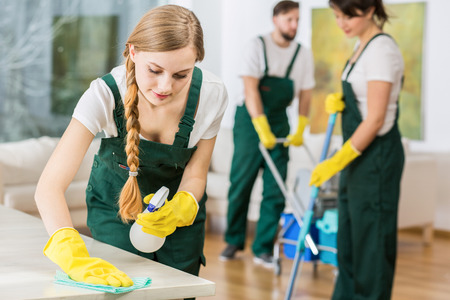
We’ve all been a bit too busy, or tired, or interested in other things to worry about keeping the house clean. When you’re strapped for time, but you still appreciate a sparkling home, bringing in a professional cleaning company is a great way to maintain your sanity and clean the house.
But, you shouldn’t just choose the first cleaning company that you come across online. After all, the people you hire will be spending a lot of time inside your home, and you want to be sure you can trust them. Plus, you want to make sure you’re getting a good deal.
Read on for a few key questions to ask before hiring a cleaning company.
Do you have insurance?
The most important question to ask is whether the cleaning company is bonded and insured. They should carry liability insurance and bond, and have policies to follow for what to do if one of your items is broken or goes missing during a cleaning, according to Angie’s List.
You should also make sure that any potential company that you hire has workers’ compensation insurance and ask to see proof. If a worker is injured in your home, or even while driving on their way to your home, if your cleaning company isn’t properly insured, it could end up costing you.
Keep in mind that your homeowner’s insurance doesn’t typically cover short or long-term disability or workman’s comp from injuries sustained by workers in your home.
If the cleaning company balks at the question, move on. If they are happy to provide the paperwork, and don’t seem surprised that you asked, chances are they’re a reputable company and they have their insurance in order—but definitely look at the paperwork yourself.
How do you determine prices?
Chances are, this will vary from company to company. It’s important to understand how your cleaning company will set rates for your home before you sign on the dotted line. Ask for an estimate for how long it’ll take to have your home cleaned.
If you want to make sure to control costs, ask about capping the number of hours workers can be at your home. And, most companies will charge an hourly rate for the initial visit, and then a flat rate based on that visit after that.
Do you use your own cleaning supplies, or do you want me to supply them?
Another hot button issue when it comes to cleaning services is who provides the products. If you have very specific products that you want your cleaning company to use, then they should be able to make that allowance. But, it’s always nice when the cleaning company provides the products themselves. That way, the workers will be properly trained on how to use the products, and you won’t see any damage to your furniture if, for example, someone used the wrong cleaning agent.
Some cleaning companies may offer a few options in terms of which products you’d like them to use. If it’s important for you and your family, ask about non-toxic options.
How do you screen your staff?
Like we said in the intro, the staff at the cleaning company will be trusted with keys to your home, so you want to make sure the people who are working for the cleaning company are screened. Most companies will provide background checks if you ask, and some companies will also do drug screenings of their employees.
What services are included?
Some cleaning services include laundry, while others don’t – you may prefer to ask for deep cleans of windows, baseboards, and bathrooms from your cleaning service, and leave the daily tasks like dishes for yourself. Or, you can request that everything is cleaned. It all depends on your preference, and what the cleaning company offers.
What should I do with my pet?
Ask about what your cleaner is most comfortable with when it comes to your pet. If you won’t be home during the cleanings, introduce your dogs to your cleaner before they clean for the first time, that way your pup won’t be alarmed when your new cleaner lets himself in.
If your cleaner would prefer to clean the home without the dog around, make sure the pup is crated or staying with a friend during the clean.
Can I see references?
The last thing we recommend you asking is for references: most cleaning companies will have these handy and be happy to send them to you. Customer satisfaction is a great indication of a good service, so if the reviews look really good and honest, chances are you can trust the company.
Cleaning your home probably isn’t your favorite way to spend the weekend, but it’s important to do a deep clean of your home’s main hang-out areas, like the kitchen, at least once a month. But, a simple wipe down of the countertops won’t do it. One place that tends to get over-looked during your weekly sweep and dust is your kitchen appliances. Can you remember the last time you gave your microwave a good wipe down inside and out?
SpongeOutlet.com is here with some tips for cleaning your kitchen appliances.
No matter what type of appliances you have, new, old or stainless steel, we’ll help you get them sparkling clean in no time!
Ice Maker
Whether you have the typical ice cube trays or a more sophisticated built-in version, your ice maker needs to be cleaned about once a month. When it doesn’t get proper care, it can foster an unsanitary environment, leading to germ growth and potential health risks.
If you have a fridge and freezer with an ice machine built into the freezer door, the manufacturer probably has a cleaning solution that can be used to safely clean the icemaker. If you no longer have your owner’s manual, check online for their recommendations.
To get started, unplug your fridge and transfer any sensitive items to your secondary refrigerator. Wipe down the ice drawers with mild soap and warm water, and thoroughly dry the area with a towel before you close the door.
If your freezer and ice maker has a filter, change or wash it. Then, de-clog any chutes that may have built up excess water by using a warm, damp cloth to melt the built-up ice.
Check the filter behind your fridge, and if it needs to be dusted, take care of that before you plug it back in and slide it back where it belongs.
Fridge & Freezer
While you’re working on your ice maker, don’t forget to clean your fridge and freezer. After time, food spills and crumbs on the shelves can cause odor, mold growth, and an unpleasant look. Remove everything from the fridge and freezer, and use a warm, damp cloth with a mild soap to remove any built-up food items. Some fridges and freezers may have removable doors that you can pop in your dishwasher.
Don’t overlook the vegetable drawers: those areas tend to get messy the fastest and may need a wipe-down once a week!
Blender & Mixer
If you use your blender regularly, you know that the blades can be tricky to clean, but it’s important to clean them thoroughly—otherwise, food particles will remain there and cause mold growth. You wouldn’t want that to end up in your next smoothie or milkshake!
If your blades are machine washable, give them a scrub with a small kitchen appliance brush, and pop them in the dishwasher. Make sure you check under the blades and under the center piece to make sure all the food from this morning’s protein shake is removed.
Coffeemaker
RealSimple.com says that your coffee maker is just as important to clean regularly as your favorite mug. Follow the instructions for cleaning and rebalancing in your owner’s manual. Start by removing and washing the filter and the carafe—if you have a reusable filter, avoid using soap but rinse the filter thoroughly.
Brew a pot of 2-3 cups water, with equal parts white vinegar to clean out the innards of the coffee maker. You may need to repeat this step a few times. Turn the machine off about halfway through the cycle to let it sit, and then turn it back on.
After your vinegar brew, brew 2 pots of regular water to remove any vinegar deposits. And, don’t forget to show the outside of the coffee maker some love with a good wipe down with soap and water.
First, remove the racks and drawers from your dishwasher. Clean the interior with warm soapy water and a soft cloth. Run an empty cycle with the detergent cup full of vinegar or powdered lemonade mix to remove stains.
Microwave
To give your cruddy microwave a makeover, microwave a large bowl of water with slices of lemons until the water boils. Remove stains with a soft damp cloth and soapy water. Remove the tray and wash with hot water and dish soap or run it in your newly cleaned dishwasher.
Toaster
HouseLogic.com says to start by unplugging your toaster. Remove and wash the crumb catcher, making sure it’s completely dry before replacing it. Shake the machine upside down over the sink to dislodge loose crumbs.
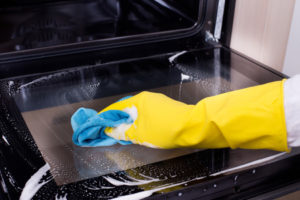
Oven
Most ovens have a self-cleaning option: while that runs, remove the grates from the stovetop and stick them in the sink. Fill the sink with hot water and dish soap and let the grates soak to remove stubborn cooked on food. Replace drip plates that have seen better days, and clean everywhere: including under the top of the stove. You can use your vacuum cleaner to remove hard to reach crumbs.
Pick up all the supplies you need to give your kitchen appliances a deep clean at SpongeOutlet.com. Our eraser sponges can help you remove tough stains and stubborn baked-on gunk. For more cleaning tips, check out our blog often!
Your bike is your loyal companion out on the road or trail. When you return from a long day of pedaling, chances are you’ll toss your favorite bike shorts and windbreaker in the washing machine—but when’s the last time you washed your bike?
If your bike is looking a little worse for wear these days, but you’re not sure where to get started to make it look like new again, you’re in luck: SpongeOutlet is here today with a step-by-step guide to cleaning your bike. Read on, pick up the supplies you need, get started, and then get back to the trails!
Plus, cleaning your bike regularly will maintain its paint job and keep it looking as good as the first day you rode it out of the bike shop. If you don’t clean your bike regularly, the dirt and grime build up can start to impact some of its mechanical integrity.
Gather Your Cleaning Supplies
You’ll need a few things to properly clean your bike, so the first thing you should do is gather your supplies. Grab two buckets, bottle brushes if you have them, a soft microfiber cloth, regular sponges, eraser sponges, a garden hose, degreaser for the chain, and dish soap.
Depending on the type of bike you have, there may be specific cleaning instructions, so make sure you check the internet before you dive in with your scrub brush. If your bike company or brand recommends a certain type of soap, it’s probably a good idea to pick up a bottle. Your bike is made to last through tough conditions, but it’s important to make sure you’re doing everything you can to maintain its paint.
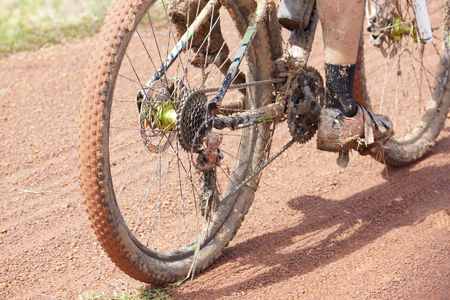
Step One: Clean Your Bike Wheels
The first thing you want to do is fill your buckets with dish soap and water and remove the wheels from your bike. Use a soft, plastic brush to gently remove grease and grime from your wheels. Don’t forget the valve, spokes and hub, and flip the wheel over when you finish one side.
One of the buckets will be the grimy bucket, and the other will be the finishing bucket. Use the cloth or sponge in the grimy bucket to do your first round of washing—give everything a good wipe down.
Once you give everything a good scrub, hose down the wheels. Then, swap to the finishing bucket, and re-scrub everything. This will ensure you loosen all of the fine dirt that might be stuck in your wheels’ nooks and crannies.
Once you’re done with the wheels, check the tires for air and set them aside to dry.
Step Two: Clean Your Bike Chain
Use a degreaser, and apply it to each of the links: Bicycling.com says turning the cranks backwards can make it easier to reach each and every link. If your chain is still a greasy mess after you use your degreaser, you can apply a little dish soap and run your eraser sponge around the chain.
A little grease left over is OK, as long as you remove the major build up. Rinse the chain, repeat if necessary, and move on to step three.
Step Three: Clean Your Bike Frame
Next up is the frame: use a soft sponge or microfiber cloth and start at the top and work your way down. Start by wetting the frame with a garden hose, and then using your cloth to scrub it. Tough spots can be tackled with eraser sponges, just be careful not to damage the paint with too much harsh scrubbing.
Rinse, repeat, and then buff with a dry microfiber cloth to make sure all areas of the frame have dried to a sparkling finish. Buffing your bike after you clean it with a microfiber cloth can actually prevent dirt from sticking to it while you’re out on your next ride!
Step Four: Clean the Smaller Parts of Your Bike
Use a toothbrush to get the grime and grease out of any hard-to-reach areas on your bike, and don’t forget to dry and buff those areas really well when you finish up. And, remember to wash things like handlebars, cup holders, and pedals. Some of these pieces may be easy to remove, so if you’re going for a deep clean, snap off the pieces and clean them before reattaching them to the bike.
Just like any pastime, riding a bike can be fun, relaxing and rewarding, but it’s important to take care of your equipment. After all, you spent a good deal of money on it! So, remember to regularly wash your bike, and if you’re not up for a weekly deep clean, a wipe down with a microfiber cloth and some soapy water after a ride in between deep cleans will do the trick.
For more tips on cleaning items around your car, office and home, check out our blog. Contact SpongeOutlet today if you have any questions about our products or how you can use them to keep your life sparkling clean!
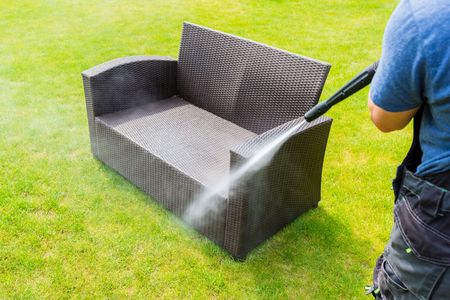
Finally, we’re able to enjoy some good weather! The sun is shining, it’s warm and comfortable, but your outdoor furniture is covered in pollen and dirt from last year…
Well, not to worry, SpongeOutlet is here today with some tips on how to clean your outdoor furniture this summer.
Whether you just broke your outdoor furniture out of the garage, or you’re finding that it needs a good wipe down after it’s been out on the back deck for a couple weeks, we have the info you need.
Dirt & Dust Build Up
Outdoor furniture is prone to dirt and dust build up, so it’s important that you properly store it when you’re putting it away for the winter. If you can, wrap it in an old sheet or cloths to keep the dirt at bay, and keep it in a dry spot in your garage or shed.
When you first take your furniture out of storage, even if it was covered, you’ll need to give it a good wipe down before it’s safe to sit on. The first thing you should do is attack the furniture pieces with a bucket of soapy water, and a microfiber cloth or paper towels. This will remove all the fine dirt and dust that built up on the chairs during the winter months.
Don’t skip this step, even if your chairs were stored in a clean space, dust is everywhere! And you don’t want it to transfer to your guests’ clothing once they sit on your furniture.
Make sure you choose the proper soap for your furniture. If your furniture is wicker or wood, you’ll need to use an oil-based soap to remove any dust and grime from the surface. Metal frames can be cleaned with mild dish soap.
Don’t forget to give everything a good rinse, and let it dry completely before you use the furniture.
And, if your furniture is hard wood, you may want to sand the surface and apply a fresh coat of paint each year before use.
For areas that have become rusty or stained from last summer’s use, that you can’t clean easily with a cloth and soapy water, take an eraser sponge to the area. Eraser sponges will remove any tough stains from the surface of your furniture but be careful in areas where the paint is chipping—you want to avoid causing further damage to the paint.
Cushions
If your outdoor furniture has cushions attached, you should follow the cleaning instructions on the pillow tags. If they are machine washable, toss the covers in the wash and make sure they are completely air or tumbled dry before you use them. If your cushions aren’t machine washable, you can probably still clean the surfaces of them with a damp cloth to remove any dirt or dust.
Maintenance
On a weekly basis, hose down your furniture to remove debris like leaves and bugs that could damage the integrity of the rust-resistant paint on the surface of the furniture. Make sure that you take the cushions inside whenever you can if it’s going to rain: prolonged exposure to rain without ever becoming fully dry will cause mold to grow inside and on your cushions.
About halfway through the summer, or once a month, give your furniture another wipe-down with a cloth and soapy water, to make sure that you’re removing any dust and dirt that’s stuck to the surfaces. And, if there are any stains, use an eraser sponge to get rid of them right away.
If you have a big party and your furniture is used heavily over the course of an evening, it’s a good idea to hose everything down to remove food and alcohol particles that could cause problems down the line.
And, if you know there’s going to be a big summer storm, bring your furniture inside or tie it to your deck to avoid it being thrown around in the wind and damaged, or damaging something else, like your house!
Proper Storage
At the end of the summer, repeat the deep clean that you performed at the beginning of the season to remove dirt and grime, and store your furniture in a place where it will stay dry and not too cold, if possible. Wrap your furniture with old sheets or cloths, and keep any fabric or pillows sealed in a storage bin.
If you follow these simple (and frequent) cleaning tips, your furniture will last you for many summers to come. In the meantime, get outside and enjoy the beautiful weather!
For more information on Sponge Outlet products, or for more cleaning tips for around the house, head to our blog often! Questions? Call us at 877-776-6430.

 Step 2: Remove the mold

 Can I see references?
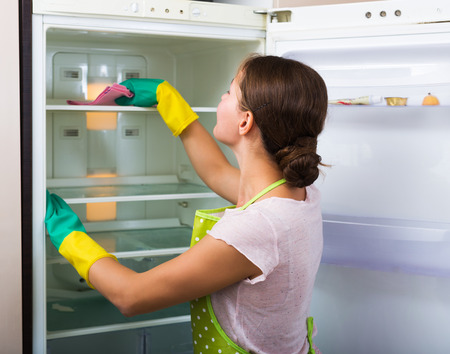
 Step Two: Clean Your Bike Chain
 For more tips on cleaning items around your car, office and home,