Mold is the last thing you want to find inside of your home. Mold can grow in plenty of conditions, so if your home is the right blend of warm and moist, you may be at-risk.
But not to worry. If you have mold, you can get rid of it by taking a few key preventative steps and removing it completely from the areas inside your home that are affected.
Read on to learn about ways to remove mold from walls so you can avoid replacing the interior of your home!
Step 1: Identify the mold
The first thing you’ll need to do when you suspect that there’s mold in your home is identify what kind of mold you’re dealing with. Some molds can be very detrimental to your health, while others are not so harmful, so it’s important to take the proper precautions.
Mold can grow anywhere, but you’ll most often find a version of it called mildew in your shower tile grout lines, other areas in damp bathrooms, and walls that had recently been wet due to a leak. To see if you’re dealing with mildew, test a small area by placing a few drops of bleach. If the bleach lightens up the dark spots, then you’re dealing with mildew. If it stays black, you probably have something else—like dirt!
Other molds, or mold in a high concentration, will give off a musty odor. If you can smell something funky, but can’t see what you’re dealing with, it might be a good idea to bring in a professional. Mold can be tricky to remove, even in the best of circumstances, and if you can’t see the mold, it’s probably burrowed in your walls.
Black mold is also something that you shouldn’t attempt to remove—let the professionals deal with it.
Step 2: Remove the mold
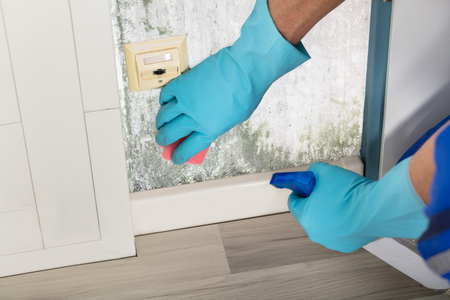
Once you’ve identified that you have an area of your home that needs to be cleaned and rid of mold, you’ll need to gather your supplies. Remove any furniture from the area that needs to be treated, and put on a pair of rubber gloves, goggles and a mask to protect yourself. You’ll also want to wear old clothing that you won’t mind bleaching or tossing when the task is done.
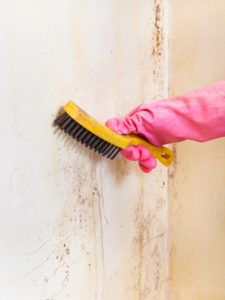
Home Guides says to mix 3 parts warm water to 1 part detergent in a spray bottle. Spray the solution on the moldy areas of the wall, and scrub with a towel. Keep in mind that wire brushes may damage your drywall. Once all areas have been washed, use a clean spray bottle to apply water and wipe the area dry.
Next, mix a solution of 1 part bleach to 2 parts water. Spray the mixture on the affected areas, and let it sit for 10 minutes. Then, rinse with the water-only spray bottle. Dry with a clean cloth or rag, and discard of any used towels or rags in a tightly sealed garbage bag.
If these steps don’t work, or you prefer to not use bleach in your home, you can try to remove the mold with a vinegar mixture.
Spray the mold with vinegar and let it sit for 1-2 hours. Afterwards, mix baking soda and water to form a paste, and use this paste to scrub the affected areas of your wall. Rinse with clean water when you’re finished.
Step 3: Repaint the mold areas
Unfortunately, removing mold can be a bit of a messy business, so chances are you’ll need to re-paint your walls once the mold has been taken care of. The bleach and the scrubbing won’t be kind to your paint job, so plan for a re-paint. If your walls are still dark and stained from the mold, ask your local hardware store about a primer that will cover up those stains.
Step 4: Prevent mold
Antimicrobial sprays can be used to prevent mold in your home. Or, you can pick up an anti-mildew paint from your hardware store.
In areas that are often subject to heat and humidity, consider installing a de-humidifier to pull excess moisture from the air and prevent mold growth. Keep everything as well-ventilated as possible.
Pick up your mold-removal supplies for your home right here at Sponge Outlet. Our microfiber cloths are great for wiping down walls and other affected areas, and our eraser sponges are great for treating tough stains caused my mildew. For more tips and tricks to keep your home clean, head to our blog! Need help placing an order? Call us at 877-776-6430.
We’ve all been a bit too busy, or tired, or interested in other things to worry about keeping the house clean. When you’re strapped for time, but you still appreciate a sparkling home, bringing in a professional cleaning company is a great way to maintain your sanity and clean the house.
But, you shouldn’t just choose the first cleaning company that you come across online. After all, the people you hire will be spending a lot of time inside your home, and you want to be sure you can trust them. Plus, you want to make sure you’re getting a good deal.
Read on for a few key questions to ask before hiring a cleaning company.
Do you have insurance?
The most important question to ask is whether the cleaning company is bonded and insured. They should carry liability insurance and bond, and have policies to follow for what to do if one of your items is broken or goes missing during a cleaning, according to Angie’s List.
You should also make sure that any potential company that you hire has workers’ compensation insurance and ask to see proof. If a worker is injured in your home, or even while driving on their way to your home, if your cleaning company isn’t properly insured, it could end up costing you.
Keep in mind that your homeowner’s insurance doesn’t typically cover short or long-term disability or workman’s comp from injuries sustained by workers in your home.
If the cleaning company balks at the question, move on. If they are happy to provide the paperwork, and don’t seem surprised that you asked, chances are they’re a reputable company and they have their insurance in order—but definitely look at the paperwork yourself.
How do you determine prices?
Chances are, this will vary from company to company. It’s important to understand how your cleaning company will set rates for your home before you sign on the dotted line. Ask for an estimate for how long it’ll take to have your home cleaned.
If you want to make sure to control costs, ask about capping the number of hours workers can be at your home. And, most companies will charge an hourly rate for the initial visit, and then a flat rate based on that visit after that.
Do you use your own cleaning supplies, or do you want me to supply them?
Another hot button issue when it comes to cleaning services is who provides the products. If you have very specific products that you want your cleaning company to use, then they should be able to make that allowance. But, it’s always nice when the cleaning company provides the products themselves. That way, the workers will be properly trained on how to use the products, and you won’t see any damage to your furniture if, for example, someone used the wrong cleaning agent.
Some cleaning companies may offer a few options in terms of which products you’d like them to use. If it’s important for you and your family, ask about non-toxic options.
How do you screen your staff?
Like we said in the intro, the staff at the cleaning company will be trusted with keys to your home, so you want to make sure the people who are working for the cleaning company are screened. Most companies will provide background checks if you ask, and some companies will also do drug screenings of their employees.
What services are included?
Some cleaning services include laundry, while others don’t – you may prefer to ask for deep cleans of windows, baseboards, and bathrooms from your cleaning service, and leave the daily tasks like dishes for yourself. Or, you can request that everything is cleaned. It all depends on your preference, and what the cleaning company offers.
What should I do with my pet?
Ask about what your cleaner is most comfortable with when it comes to your pet. If you won’t be home during the cleanings, introduce your dogs to your cleaner before they clean for the first time, that way your pup won’t be alarmed when your new cleaner lets himself in.
If your cleaner would prefer to clean the home without the dog around, make sure the pup is crated or staying with a friend during the clean.
Can I see references?
The last thing we recommend you asking is for references: most cleaning companies will have these handy and be happy to send them to you. Customer satisfaction is a great indication of a good service, so if the reviews look really good and honest, chances are you can trust the company.
The best way to clean kitchen appliances is to match the cleaning method to the appliance and its finish. Start with a clean, soft cloth and the cleaner recommended in the owner’s manual. Loosen dried spills before wiping, keep water away from electrical components, and dry surfaces before putting the appliance back into use.
Whether you are cleaning your own kitchen, preparing a rental for new guests, or stocking a professional cleaning cart, a few well-chosen supplies can cover many everyday jobs. This guide walks through refrigerators, microwaves, ovens and smaller appliances, with tips for choosing the right sponge or cloth along the way.
Choose your kitchen appliance cleaning supplies
Keep separate tools for washing, drying and spot cleaning. A cloth used on the floor should never be the one you reach for inside the refrigerator.
Microfiber cleaning towels are useful for everyday wiping and drying. Keep a fresh towel ready for the final pass over appliance exteriors.
Swedish dishcloths offer a reusable option for absorbing ordinary spills and wiping washable surfaces.
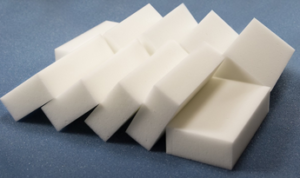
Instant Erase Non-Scratch Scrub Sponges combine a cellulose sponge with a scrubbing side. Use only where the appliance’s care instructions permit a scrub sponge, and test first.
A soft brush can help with removable filters and small crevices when the manufacturer recommends it.
Have mild dish soap or an appliance-approved cleaner available. More cleaner or a rougher pad is not always the answer to a stubborn mark. Giving residue time to soften can reduce the amount of scrubbing needed.
Check the finish before you scrub
Stainless steel, painted metal, glass and plastic can require different care. Fingerprint-resistant finishes and touchscreens may have coatings that ordinary scrubbing can damage. Check the manual, test a hidden area and inspect your cloth for grit before starting.
Melamine eraser sponges clean through fine abrasion. That makes them useful for certain marks on compatible hard surfaces, but unsuitable as an all-purpose appliance scrubber. Keep them off stainless steel appliance finishes, glossy coatings, nonstick surfaces and electronic displays unless the manufacturer specifically permits them. A successful spot test does not override the care instructions.
Let heated appliances cool and unplug portable electrical appliances before cleaning them. Apply cleaning liquid to the cloth rather than spraying controls, vents or electrical openings. Never immerse a motor base, cord or plug.
How to clean a refrigerator and freezer
Plan the job before emptying the refrigerator so perishable food can stay cold in another refrigerator or a cooler with ice packs. Follow the manual’s instructions for switching off cooling or disconnecting power during a deep clean.
Remove food and take out the shelves and drawers designed to be removable. Let cold glass shelves warm to room temperature before washing them.
Hand-wash removable parts with mild dish soap and warm water, using a soft cloth or suitable sponge. Do not assume that refrigerator parts are dishwasher-safe.
Wipe the interior and door seals, paying attention to crumbs and sticky residue in the folds. Keep excess water out of vents and seams.
Wipe away soap residue and dry the surfaces. Reinstall the parts, restore cooling and return food promptly.
Whirlpool’s refrigerator care guidance explains these precautions in more detail. For a freezer that needs defrosting, use the procedure for your model rather than chipping at ice with a sharp tool.
Treat the ice maker as a separate maintenance task. Its ice bin, water filter and internal cleaning cycle may each have different instructions. Replace filters on the manufacturer’s schedule rather than attempting to wash a disposable filter.
How to clean a microwave
Once the microwave is cool, remove loose crumbs and take out the turntable if the manual allows it. Wash the turntable using its approved method, taking care not to expose hot glass to cold water.
Wipe the interior with a soft cloth and a mild cleaning solution permitted by the manufacturer. For dried splashes, hold a warm, damp cloth against the residue before wiping it away. Avoid flooding the interior, scrubbing protective covers or pushing moisture into openings.
Clean the door edges and exterior, remove cleaning residue and dry with a fresh cloth. Follow your model’s directions if you use a steam-cleaning method; hot water and steam can burn. Whirlpool’s microwave cleaning guide provides additional guidance on interiors, turntables and exteriors.
How to clean an oven and stovetop
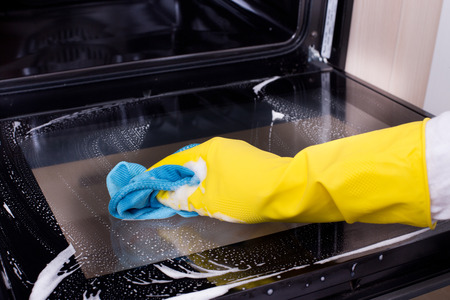
Check the oven’s cleaning instructions before choosing a product. Conventional, self-cleaning and steam-cleaning ovens do not all tolerate the same treatments. A cleaner intended for one oven may be unsuitable for another.
When the oven is cool, remove loose food and clean removable racks as directed. Use the approved cleaning method for the interior and door glass. Do not scrub heating elements or the door gasket, and do not combine an oven cleaner with a self-cleaning cycle unless the instructions explicitly allow it. See Whirlpool’s oven cleaning guidance for an overview of the different methods.
For the stovetop, identify the surface before tackling cooked-on residue:
On glass or ceramic cooktops, use the cleaner and cleaning pad specified for that surface. Use a scraper only if the manufacturer permits it and follow its directions.
On gas cooktops, remove grates and burner components only as instructed. Clean and dry removable pieces thoroughly before reassembly.
On electric coil models, keep electrical connections dry and follow the manual for drip pans and removable components.
A scrub sponge belongs only on surfaces approved for that type of tool. Its color or “non-scratch” name does not establish compatibility with every appliance finish.
How to clean a dishwasher
Empty the dishwasher and check the bottom for visible food debris. If your model has a user-removable filter, take it out and clean it according to the manual. Some filters are not designed to be removed by the user.
Wipe accessible door edges and seals with a soft, damp cloth. Then use a dishwasher cleaning product and cycle approved for your machine. Do not add hand dishwashing liquid to a dishwasher cycle or substitute an improvised cleaning mixture without checking the instructions. Whirlpool’s dishwasher guide covers filter checks and cleaning cycles.
Finish by wiping the handle and exterior with a separate cloth. If the dishwasher continues to smell or drain poorly after routine cleaning, investigate the cause rather than repeatedly adding cleaner.
How to clean stainless steel appliance exteriors
Begin with a clean microfiber cloth and the cleaning method approved for the finish. Wipe along the grain of the steel, then dry with a second clean cloth to remove remaining moisture and streaks.
Avoid steel wool, abrasive pads and harsh cleaners. Coated or fingerprint-resistant stainless steel may require different care from uncoated steel, so check before applying polish. Whirlpool’s stainless steel care guide explains how to identify the grain and choose a suitable cleaner.
Remember coffee makers and small appliances
Small appliances need attention wherever food, grease or crumbs collect. Unplug them and let them cool before handling removable parts.
For a coffee maker, wash the carafe and other removable components according to the manual. Descaling is a separate process for mineral buildup; use the recommended solution, cycle and rinse procedure rather than a universal vinegar recipe.
For blenders and mixers, clean detachable parts as directed and keep fingers away from sharp blades. Wipe the motor housing with a barely damp cloth. Only place parts in the dishwasher when the manufacturer identifies them as dishwasher-safe.
For a toaster, empty the removable crumb tray as instructed and let any washed parts dry fully before reassembly. Keep water and cleaning tools out of the heating slots. Air fryers and toaster ovens also need model-specific care, especially around nonstick baskets, heating elements and fans.
Make appliance cleaning easier to maintain
Use a short checklist based on how heavily the kitchen is used. Deal with spills once surfaces are safe to handle, inspect refrigerator shelves and microwave interiors regularly, and schedule deeper cleaning according to the manuals. A busy shared kitchen may need attention more often than a lightly used home kitchen.
For cleaning teams, assign separate cloths to appliance interiors, exteriors and other areas. Keep a clean supply available while used cloths are being washed, and replace worn sponges. Our house cleaning and maid supplies page can help you plan supplies for recurring work.
Kitchen appliance cleaning questions
Can I use an eraser sponge on every appliance?
No. Melamine foam is abrasive, even when it feels soft. Follow the appliance manufacturer’s instructions and reserve eraser sponges for compatible surfaces. Start with a soft cloth for delicate finishes.
Does a cleaning sponge disinfect a kitchen appliance?
An ordinary sponge or cloth is a cleaning tool, not a disinfectant. If sanitizing or disinfecting is required, use a suitable labeled product and follow its directions, including any food-contact rinsing requirements.
What should I buy for routine appliance cleaning?
Start with microfiber towels, an absorbent cloth for spills and a suitable sponge for washable removable parts. Add specialized tools only when the appliance calls for them. Compare Sponge Outlet cleaning products to choose supplies for the jobs you do most often.
Your bike is your loyal companion out on the road or trail. When you return from a long day of pedaling, chances are you’ll toss your favorite bike shorts and windbreaker in the washing machine—but when’s the last time you washed your bike?
If your bike is looking a little worse for wear these days, but you’re not sure where to get started to make it look like new again, you’re in luck: SpongeOutlet is here today with a step-by-step guide to cleaning your bike. Read on, pick up the supplies you need, get started, and then get back to the trails!
Plus, cleaning your bike regularly will maintain its paint job and keep it looking as good as the first day you rode it out of the bike shop. If you don’t clean your bike regularly, the dirt and grime build up can start to impact some of its mechanical integrity.
Gather Your Cleaning Supplies
You’ll need a few things to properly clean your bike, so the first thing you should do is gather your supplies. Grab two buckets, bottle brushes if you have them, a soft microfiber cloth, regular sponges, eraser sponges, a garden hose, degreaser for the chain, and dish soap.
Depending on the type of bike you have, there may be specific cleaning instructions, so make sure you check the internet before you dive in with your scrub brush. If your bike company or brand recommends a certain type of soap, it’s probably a good idea to pick up a bottle. Your bike is made to last through tough conditions, but it’s important to make sure you’re doing everything you can to maintain its paint.
Step One: Clean Your Bike Wheels
The first thing you want to do is fill your buckets with dish soap and water and remove the wheels from your bike. Use a soft, plastic brush to gently remove grease and grime from your wheels. Don’t forget the valve, spokes and hub, and flip the wheel over when you finish one side.
One of the buckets will be the grimy bucket, and the other will be the finishing bucket. Use the cloth or sponge in the grimy bucket to do your first round of washing—give everything a good wipe down.
Once you give everything a good scrub, hose down the wheels. Then, swap to the finishing bucket, and re-scrub everything. This will ensure you loosen all of the fine dirt that might be stuck in your wheels’ nooks and crannies.
Once you’re done with the wheels, check the tires for air and set them aside to dry.
Step Two: Clean Your Bike Chain
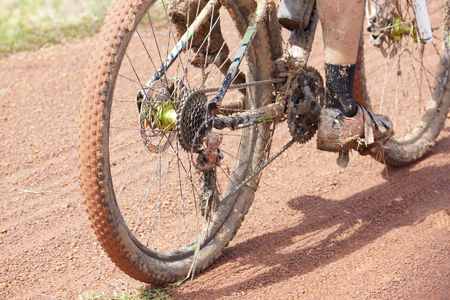
Use a degreaser, and apply it to each of the links: Bicycling.com says turning the cranks backwards can make it easier to reach each and every link. If your chain is still a greasy mess after you use your degreaser, you can apply a little dish soap and run your eraser sponge around the chain.
A little grease left over is OK, as long as you remove the major build up. Rinse the chain, repeat if necessary, and move on to step three.
Step Three: Clean Your Bike Frame
Next up is the frame: use a soft sponge or microfiber cloth and start at the top and work your way down. Start by wetting the frame with a garden hose, and then using your cloth to scrub it. Tough spots can be tackled with eraser sponges, just be careful not to damage the paint with too much harsh scrubbing.
Rinse, repeat, and then buff with a dry microfiber cloth to make sure all areas of the frame have dried to a sparkling finish. Buffing your bike after you clean it with a microfiber cloth can actually prevent dirt from sticking to it while you’re out on your next ride!
Step Four: Clean the Smaller Parts of Your Bike
Use a toothbrush to get the grime and grease out of any hard-to-reach areas on your bike, and don’t forget to dry and buff those areas really well when you finish up. And, remember to wash things like handlebars, cup holders, and pedals. Some of these pieces may be easy to remove, so if you’re going for a deep clean, snap off the pieces and clean them before reattaching them to the bike.
Just like any pastime, riding a bike can be fun, relaxing and rewarding, but it’s important to take care of your equipment. After all, you spent a good deal of money on it! So, remember to regularly wash your bike, and if you’re not up for a weekly deep clean, a wipe down with a microfiber cloth and some soapy water after a ride in between deep cleans will do the trick.
For more tips on cleaning items around your car, office and home, check out our blog. Contact SpongeOutlet today if you have any questions about our products or how you can use them to keep your life sparkling clean!
Finally, we’re able to enjoy some good weather! The sun is shining, it’s warm and comfortable, but your outdoor furniture is covered in pollen and dirt from last year…
Well, not to worry, SpongeOutlet is here today with some tips on how to clean your outdoor furniture this summer.
Whether you just broke your outdoor furniture out of the garage, or you’re finding that it needs a good wipe down after it’s been out on the back deck for a couple weeks, we have the info you need.
Dirt & Dust Build Up
Outdoor furniture is prone to dirt and dust build up, so it’s important that you properly store it when you’re putting it away for the winter. If you can, wrap it in an old sheet or cloths to keep the dirt at bay, and keep it in a dry spot in your garage or shed.
When you first take your furniture out of storage, even if it was covered, you’ll need to give it a good wipe down before it’s safe to sit on. The first thing you should do is attack the furniture pieces with a bucket of soapy water, and a microfiber cloth or paper towels. This will remove all the fine dirt and dust that built up on the chairs during the winter months.
Don’t skip this step, even if your chairs were stored in a clean space, dust is everywhere! And you don’t want it to transfer to your guests’ clothing once they sit on your furniture.
Make sure you choose the proper soap for your furniture. If your furniture is wicker or wood, you’ll need to use an oil-based soap to remove any dust and grime from the surface. Metal frames can be cleaned with mild dish soap.
Don’t forget to give everything a good rinse, and let it dry completely before you use the furniture.
And, if your furniture is hard wood, you may want to sand the surface and apply a fresh coat of paint each year before use.
For areas that have become rusty or stained from last summer’s use, that you can’t clean easily with a cloth and soapy water, take an eraser sponge to the area. Eraser sponges will remove any tough stains from the surface of your furniture but be careful in areas where the paint is chipping—you want to avoid causing further damage to the paint.
Cushions
If your outdoor furniture has cushions attached, you should follow the cleaning instructions on the pillow tags. If they are machine washable, toss the covers in the wash and make sure they are completely air or tumbled dry before you use them. If your cushions aren’t machine washable, you can probably still clean the surfaces of them with a damp cloth to remove any dirt or dust.
Maintenance
On a weekly basis, hose down your furniture to remove debris like leaves and bugs that could damage the integrity of the rust-resistant paint on the surface of the furniture. Make sure that you take the cushions inside whenever you can if it’s going to rain: prolonged exposure to rain without ever becoming fully dry will cause mold to grow inside and on your cushions.
About halfway through the summer, or once a month, give your furniture another wipe-down with a cloth and soapy water, to make sure that you’re removing any dust and dirt that’s stuck to the surfaces. And, if there are any stains, use an eraser sponge to get rid of them right away.
If you have a big party and your furniture is used heavily over the course of an evening, it’s a good idea to hose everything down to remove food and alcohol particles that could cause problems down the line.
And, if you know there’s going to be a big summer storm, bring your furniture inside or tie it to your deck to avoid it being thrown around in the wind and damaged, or damaging something else, like your house!
Proper Storage
At the end of the summer, repeat the deep clean that you performed at the beginning of the season to remove dirt and grime, and store your furniture in a place where it will stay dry and not too cold, if possible. Wrap your furniture with old sheets or cloths, and keep any fabric or pillows sealed in a storage bin.
If you follow these simple (and frequent) cleaning tips, your furniture will last you for many summers to come. In the meantime, get outside and enjoy the beautiful weather!
For more information on Sponge Outlet products, or for more cleaning tips for around the house, head to our blog often! Questions? Call us at 877-776-6430.
Is dusting just about your favorite pastime? Yeah, we didn’t think so. Here at SpongeOutlet, we’re not crazy about it either, but our years of perfecting cleaning methods and products have taught us a thing or two about the right way to clean your home. And, while you may think dusting is as simple as wiping your furniture with a microfiber cloth, we’re here to tell you that you’re skipping a few steps.
Read on to learn about how to dust the most effective way, in our must-know dusting lesson.
Must-Know Dusting Advice: Make a Plan
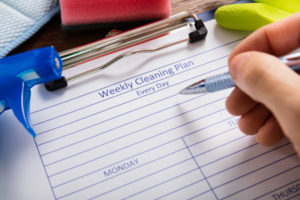
Start out by making a plan, or map of what you’ll need to dust: if you prefer lists, that works too. The reason we suggest making a plan is that dust is everywhere, and many people skip very dusty spots simply because they get distracted by other dusty spots when they get started.
A good rule of thumb is to dust one room at a time, and don’t just think about the surface: your bathroom, for example, may need to have its walls dusted. Moist air from your shower can cause dust to stick to the walls and baseboards with a little more sticking power than in other rooms.
Start at the top and work your way down. If you have a ceiling fan, dust that first. If you have crown molding, dust that second. Then, tackle the walls, then the furniture, and finally give the floors a good sweep. Dusting your room will upset the layers of dust on your floors and furniture, so starting up high ensures that you’re not leaving any misplaced dust behind. A strong finish with a vacuum cleaner is the best.
Must-Know Dusting Advice: Remove Everything
The first thing to do when dusting a room is to remove all of the items on the surfaces of your tables. You’ll be able to easily dust all surfaces and hard to reach areas, but remember: before you bring your stuff back into the room, make sure you give it a thorough dusting. It would be a shame to spend an hour dusting, only to re-deposit a pile of dust on your perfectly clean tabletops!
Must-Know Dusting Advice: Choose your Tools
We already mentioned a vacuum cleaner: utilize the extension tools that came with it, and don’t forget to change the settings for when you switch from carpet to hardwood. It might seem silly, but it actually makes a difference in how much stuff you pick up.
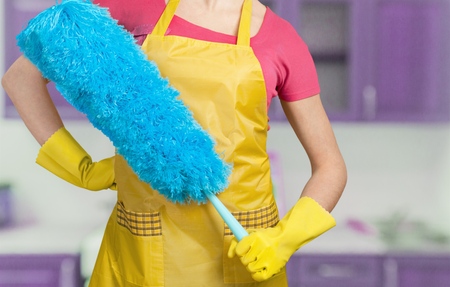
Microfiber dusting wands are a great alternative to chemical dust sprays, but those can be effective if used properly, especially on that expensive antique furniture in your living room.
Pro tip: if you’re not sure how best to clean a particular item of furniture, ask your local hardware store or furniture store for advice. There are different rules for different woods, as well as laminate surfaces.
For dust that’s a bit out of hand, use a damp microfiber cloth, like the ones available from SpongeOutlet.
Must-Know Dusting Advice: Get Preventative
According to HGTV, one of the best ways to “dust” your home is to prevent the dust from accumulating in the first place. You can do this by investing in new air filters for your air conditioner and heating systems.
If you’re really anti-dust, you can get rid of your carpeting and opt instead for washable throw rugs. Carpet tends to trap dust, and even when it’s been properly vacuumed, it often has a bit left behind.
Decluttering your surfaces is another great way to make dusting easier: without all of those pesky nooks and crannies to tend to, dusting will be easier and more efficient, costing you less time on your weekly chore list.
Must-Know Dusting Advice: Dry to Wet
If you have hardwood or tile floors, you may be inclined to mop them regularly, but it’s important to dust them first. Use a dry mop or broom to sweep away any dust that’s on your floors, because once you turn on the water, the dust will clump and become more difficult to remove.
So, a good rule of thumb: always start with a dry mop, and then switch to a wet one. The same applies when you’re dusting vanities or sinks in your kitchen and bathroom.
Must-Know Dusting Advice: Frequent Repeats
Now that you have a plan of action, the key to keeping a dust free home is to dust it frequently. You don’t have to make it an everyday chore, but at least once a week is a good rule of thumb. For households with a lot of pets and people, you may need to double or triple up.
Finally moving into your new home is so exciting: you get to rearrange all of your furniture, buy some new pieces, and decorate the space exactly how you pictured it in your head. But before you can get to all of the fun parts of moving, there are a few things you need to take care of first, including cleaning your new house from top to bottom.
Whether your home is a new construction, or you’re moving in after the previous owners vacated, it’s a good idea to do a deep clean before you move in any of your belongings. That way, you won’t have to worry about certain difficult cleaning tasks, like shampooing the carpet, once your furniture is all moved in.
If you’re not sure where to start, not to worry: SpongeOutlet is here today with some tips for cleaning your new home.
Read on for our cleaning guide, and get that new home cleaned out before the move-in date.
Sanitize the Bathrooms
The bathrooms are a great place to start. Even if they appear to be clean enough, your bathrooms can benefit from another deep clean and disinfect. Start with the toilet: replace the seat and cover if the old one is looking a little worse for wear—it’s a super inexpensive way to freshen the bathroom.
Angie’s List says don’t forget areas like underneath the sink, in the cabinets and drawers, and behind the toilet. These hard-to-reach areas may go uncleaned for a while once you move in your toiletries, so take advantage of the empty storage areas, and clean them now.
As for the shower and tub, use a grout and tile cleaner, but keep in mind that replacing the grout is an easy job that you can probably do yourself with a bit of help from your local hardware store.
Disinfect the Kitchen
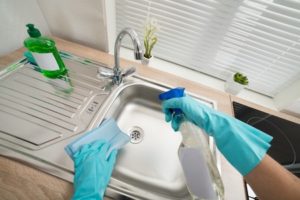
Sure, wipe down the countertops, but more importantly: clean the appliances. Remove all of the stove grates and knobs, take the shelving out of the refrigerator, and set the oven to “self-clean.” Kitchens are notorious for built-up grime, so take a look at the vent hood, and replace or clean the filter. Wipe down the walls around the stove, and make sure there’s no grease or grime stuck anywhere.
Don’t forget the dishwasher: you can search the model you have online to see the best ways to clean it, but many dishwashers will have a clean setting—just pop in some dishwasher cleaning soap.
The insides of the cabinets, including the back of the doors, will need a good wipe down. Don’t forget the knobs: they collect grease from our hands and may need some special attention.
Clean the Bedrooms
The bedrooms are a little simpler: if there are built in cabinets, give everything a dust and then a wipe down. Go over the baseboards with wood cleaner, and make sure that the shelving in the closet is clean and shiny.
As for the floor, mop if it’s hardwood or laminate, and hire a carpet cleaning service if it’s carpet. If it seems relatively clean to you, you could wash the carpet yourself; just remember that the previous owners probably didn’t shampoo before they moved out, so if they had pets or kids, it’s probably a good idea to bring in the professionals.
Check out the light fixtures next: remove the covers and dust the fixtures and the bulbs. If you have ceiling fans, make sure to give them a good dusting before you turn them on, or else they’ll scatter dust throughout the room!
Clean the Living Spaces
Living areas should be treated similarly to the bedrooms, with an emphasis on that carpet cleaning step, especially for high-traffic areas. Clean the walls, and make sure there are no fingerprints left over from toddlers, or marks on busy corners.
You can buff those out by using an eraser sponge, without damaging the paint. You may even want to dust the walls (but make sure to do this before shampooing the carpet!) with a microfiber cloth. If you have tile, Moving.com suggests renting a steam cleaner.
Don’t neglect areas like sheds and garages: truth is, if you don’t clean those out, you could be looking at an annoying pest problem down the line. Make sure to sweep the floors, de-clutter the rooms, and re-seal or caulk any holes that mice may be able to burrow into. Trust us, it’s much more annoying to deal with a squirrel living in your garage than to sweep and seal the space before moving in.
If there are washing sinks or laundry machines in these spaces, clean those two: search for your washing machine and dryer models online to find out the best way to clean them, and don’t forget to pull them out from the wall and dust behind!
Moving into a new home can be overwhelming at times, but if you get the heavy lifting cleaning out of the way before move-in day, you can focus on unpacking and getting settled in. For more tips on how to clean your home the best way, check out SpongeOutlet’s blog.
When you’re ready to deep clean, pick up all of the cleaning supplies you’ll need from SpongeOutlet!
There’s no doubt about it, preparing your home for a new baby is a huge feat. You need to stock up on supplies, baby-proof areas like sockets and sharp corners, paint the nursery and that’s not even counting the ways you’ll need to mentally prepare!
One thing that new-moms-to-be are liable to forget about in the stress and excitement of having a new baby is cleaning the home. Bringing a new baby into your house is a great reason to do a little spring cleaning, no matter what time of year it is. You don’t want built up dust and grime bothering your newborn; plus, you’ll probably have a ton of visitors in the next few months, and visitors usually bring their germs with them.
If you’re not sure where to start when it’s time to start cleaning your home in preparation for baby, here’s a list for you and your partner to tackle together.
Clean the Crib & Changing Table Before Baby Arrives
Even if you just purchased your baby’s bedroom furniture, it will need to be cleaned before the baby comes home. The warehouse or shop where the furniture was built or sold probably was not the most sanitary space, so make sure to disinfect all surfaces.
If your items are hand-me-downs, use an eraser sponge to remove stickers, crayon marks, and other general wear and tear that may show on the furniture.
Clean the Nursery Curtains Before Bringing Baby home
If your nursery has curtains hung on the windows, take them down and wash them before baby arrives. Curtains are notorious for holding dust build-up, so if you’re making some cosmetic updates to the room, go with blinds instead. They’re easier to clean, and won’t hold as much dust.
Clean the Car Before Taking Your Baby Home
Head to the garage for your next cleaning task: Give your car a good cleaning on the interior before you drive baby home from the hospital. Build up on the door handles and steering wheel can transfer from your hands onto your newborn, and since they hardly have an immune system yet, you don’t want to risk them getting sick!
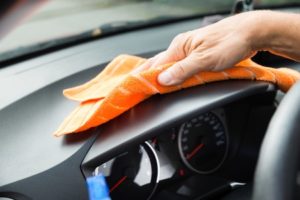
Use our microfiber cloths and disinfectant spray on all parts of the car’s interior (and exterior, like door handles) that you touch on a regular drive. And, while you’re at it, make sure baby’s car seat handles are disinfected, and if you can remove the padding for baby’s seat, toss it in the wash.
Clean the Carpets Before Bringing Baby Home
Carpeting is another notorious item for storing dust and mildew. Check out a non-toxic cleaning service. It may not smell as lemon-y fresh, but it’ll clean your carpets without leaving behind chemicals that can be harmful to your baby.
Clean the Kitchen Before Bringing Your Baby Home
Baby food prep, whether you’re breastfeeding or not, will most likely happen in the kitchen—those bottles of breastmilk won’t warm themselves up, after all. Make sure you do a deep clean of your kitchen, including all surfaces, the sink, and the inside of your appliances, including the fridge and the microwave. Anything that you do in the kitchen (like marinating cubes of raw chicken) could come in contact with a baby food item or your formula. Take precautions once baby arrives, but a deep-clean prior to that day will make you worry less.
Clean all Linens Before Baby Arrives
Don’t just open a fresh set of sheets for the crib and throw them on: make sure to machine wash them with soap that’s safe for baby. You should do the same for your bedding, too, including your comforter and any throw pillows that you have hanging around. Chances are, you and baby will be spending quite a bit of time napping in your bed, so cleaning the crib is only half the battle.
Preparing to bring home baby doesn’t have to be a scary process. If you make a list of all the items you need to clean prior to leaving for the hospital, then you and your partner can cross everything off in a couple of days.
Once baby arrives, don’t forget to work these disinfecting practices into your regular cleaning routine: wiping down surfaces with disinfecting wipes will keep your baby from being exposed to potentially germs! And tools like microfiber clothes and eraser sponges can help make your cleaning routine easier to deal with.
For more information on how to stay clean after baby comes home, click here to read our post about how eraser sponges will make cleaning a breeze for any mom.
During the winter months, it can be hard to keep your car looking clean. The roads are often covered in salt on a daily basis and paying for a car wash seems pointless.
Although we understand the struggle, it’s really important to regularly wash that four-wheeled vehicle. Spring is here (hopefully to stay) which should make it easier to get out and clean your car yourself, saving you money down the line!
A buildup of dirt and grime on a car can result in chipped paint and rusted metal on the exterior of your car and believe it or not, the inside of your car can suffer too from not getting cleaned on a regular basis.
SpongeOutlet has some tips on how you can clean and preserve the exterior and interior of your car with our products, such as our eraser sponge and microfiber towel.
If you’re planning on doing a little bit of “spring cleaning” within your car, which you certainly should, keep these tips handy! If you follow our instructions, both your interior and exterior will shine for months to come.
Using Eraser Sponge on your Cars Interior
You might think that our eraser sponges are meant to be used only in the home but they can serve a great purpose when it comes to cleaning your car as well.
Start with taking a wet sponge to your car’s center console and dashboard.
Both of these areas not only collect a lot of dust but host fingerprints and coffee spills which build up on the surface over time, making them appear both dull and dirty. Using gentle motions move the eraser sponge in a circular motion to remove any buildup.
The steering wheel is another space that you’ll want to pay close attention to when doing a thorough cleaning of your car.
If you are in your car, chances are your hands are on the steering wheel which makes it one of the places that gets, quite frankly, filthy. You can use our eraser sponge to remove gunk and grime from your steering wheel, leaving it as good as new.
If you have a leather or vinyl interior, an eraser sponge can be great for removing food stains or even colored pencil stains if your children got carried away crafting in the backseat during a long road trip.
Click here for some more tips on using your eraser sponge to get the interior of your car cleaned up.
Eraser Sponge for Your Cars Exterior
The eraser sponge can also be used on some parts of your car’s exterior to remove tough stains.
For instance, our hubcaps or rims are often one of the first things on our car to get soiled. If your hubcaps are looking dull, wet an eraser sponge and start scrubbing to make your whole wheel look brand new.
Watch the video below to check out our technique when it comes to scrubbing your hubcaps clean:
It is important to avoid using our eraser sponge on any painted portion of your car because it may cause the paint to chip or fade. However, areas with stubborn stains such as door handles, roof racks, grills, and even glass can benefit from a bit of eraser sponge action!
Wipe with a Microfiber Cloth on the Interior
On a daily basis, your car’s interior collects dust just like your home does. Consider keeping one of our microfiber cloths in your glove compartment to give your car a quick wipe down before you park it for the night. You’ll be surprised to find out how much dust actually builds up inside your car!
If it’s time to give the exterior of your car a good washing, you can use our microfiber cloths to clean your car as well.
Simply fill a bucket of warm water with an appropriate soap, dip in our microfiber cloth, and start wiping!
You can also use our microfiber cloths to dry your car once you’re finished rinsing away any soap residue.
Once you’ve cleaned your car, you should also consider giving it a fresh wax. Other towels made from cotton can leave particles behind resulting in streaks after waxing but our microfiber cloths won’t. The smooth fabric of our microfiber cloth will leave your car looking shiny and clean with no lint left behind.
While you’re cleaning, Auto Trader says you should also check your tire pressure and your wiper blades. Don’t forget to check the oil, too.
Cleaning your car can be a pain, but it’s important to do regularly: don’t overlook the interior after you wash the exterior! The products we offer here at SpongeOutlet can help make the process easier to deal with.
Spring may have sprung in some parts of the country, but besides warm weather and longer days, that means one thing for sure: it’s the season of the common cold!
No matter what you do on a daily basis, you’re at-risk for the common cold when the weather changes from cold to warm; when you’re out and about, there’s not much you can do to avoid it except washing your hands frequently, and staying away from other people who are sick. If someone gets sick in your home, though, then you definitely need to take a few preventative steps to keep others in your household from getting sick.
Here are some tips on what to clean at home after getting sick, to prevent your loved ones and any visitors to your home from picking up the same virus!
Clean the Usual Places After Getting Sick
High-traffic areas should be your first stop after a virus runs its course through your home. Use disinfectant spray to tackle door knobs, light switches, bedside tables, kitchen appliances, TV remotes, cell phones, and drawer pulls that you may have touched while you were contagious. Don’t forget your garbage cans: if there were lots of tissues piled up in there, your garbage can could probably use a good wipe down.
Think about where you spent most of your sick day home from work, and make sure to disinfect those areas: you might want to add your coffee table, bedside table, entertainment center, gaming consoles and anything else you used to pass your sick time, to the list.
Clean Toys After Getting Sick
If you have kids and one of them was the virus carrier, make sure to disinfect their toys and stuffed animals. Stuffed animals may be able to be machine washed, but for most toys, you’ll need to disinfect and wipe dry. Some toys can be cleaned by going in the top shelf of the dishwasher.
This can prevent your kiddo from spreading the virus to his or her friends at school, and it’ll also make other parents feel more comfortable bringing their little one by for a play date after your child has recovered.
Wash Your Bedding After Getting Sick
If you wallowed in bed for a couple of days during your cold, chances are, your sheets could use a wash. When you’re sick, you sweat more than usual, especially if you had a fever. So, once you’re cured, strip the bedding and wash everything. While your bedding tumbles dry, leave your mattress uncovered for a while so that it can air out, too. Take your vacuum cleaner stick attachment to the mattress to rid it of dust and dandruff that can aggravate colds and allergies in the future.
Wash everything in hot water and use a bit of liquid bleach if your sheets can tolerate it!
Clean Bathrooms After Getting Sick
Clean your bathroom and not just the touchpoints like the faucet. Do a deep clean of the bathroom where the sick family member spent time; wash the shower curtains, scrub the tub and the toilet, and use a disinfectant spray on the sink. Tile floors should be mopped, and any rugs or mats tossed in the washing machine.
Don’t forget the towels! Hand towels should be washed every couple of days and more frequently when someone is sick to prevent spreading the illness. In fact, it’s a good idea to designate one specific hand towel per person while someone is fighting off a cold, to be extra sure that the virus won’t pass while you’re washing your hands in the bathroom.
Use a microfiber cloth for disinfecting the bathroom and other hard surfaces, like the countertop in the kitchen: you’ll get a cleaner clean than using items like paper towels, and you can wash and re-use microfiber cloths.
Clean Your Toothbrush After Getting Sick
If you use an electric toothbrush, follow the cleaning instructions that came with the product in order to give it a deep clean. Disposable tooth brushes should be swapped out for a fresh one.
Let Fresh Air In Your House After Getting Sick
An open window will help wash out that old, stale air from your home so that everything smells fresh and clean. If it’s chilly in your neighborhood, crack the windows at night while you’re snuggled in bed: a little bit of fresh air can do wonders, but you won’t recover fully if it’s too cold inside!
Clean Your Car After Getting Sick
Don’t forget to clean your car! Your steering wheel probably has some dirt and grime on it from your cold, so use a disinfectant spray that’s safe on leather (or whatever your wheel is made of) and disinfect, along with other frequently touched areas in your car like the radio dial, gear shift, and cup holders.
Watch our video for additional car cleaning tips:
https://www.youtube.com/watch?v=ky9kpm6yaq4
If you’re careful to clean all of these areas in your home, and quit sharing water bottles and food while you’re feeling under the weather, there’s no reason to believe that anyone else will catch your cold!

 Step 2: Remove the mold
 Step 2: Remove the mold
 Can I see references?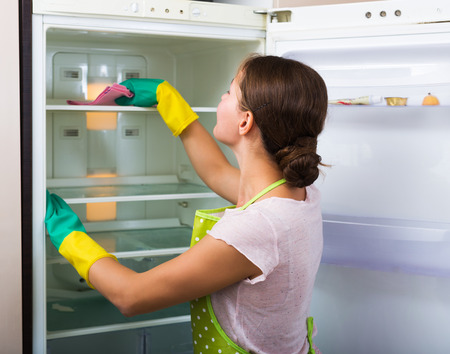
 Step Two: Clean Your Bike Chain
 For more tips on cleaning items around your car, office and home,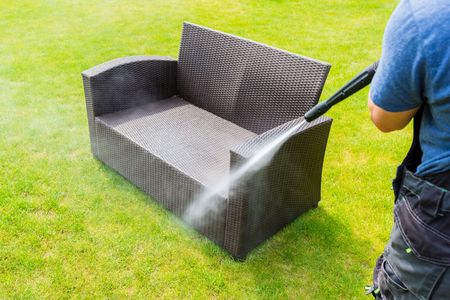

 Must-Know Dusting Advice: Choose your Tools
 Must-Know Dusting Advice: Frequent Repeats
 Disinfect the Kitchen
 Clean the Car Before Taking Your Baby Home
 Clean all Linens Before Baby Arrives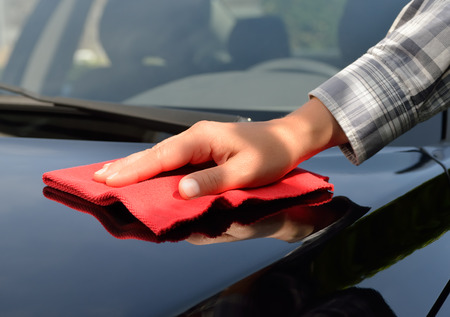
 Wash Your Bedding After Getting Sick