Your snowmobile is going to go through some rough riding this winter. You’ll want to make sure it is always in good condition, which means cleaning it is a must to make it look in tip-top shop. Here are some suggestions on how to clean it after a long ride out in the snow.
What You’ll Need
Snowmobile cleaning is rather simple, so don’t get stressed out. You won’t have to go out and get a fancy cleaning solution.
Sponge and scrub brush
Polish and wax for plastic and metal parts
Clean towel
First, you should hose off the snowmobile with a hose that has solid water pressure. Once you’re done hosing the vehicle, take an eraser sponge from Sponge Outlet, and scrub the entire snowmobile.
For the tough spots where you need to scrub, grab our scrubby sponge to get the tough grime and dirt. Rinse off the vehicle after scrubbing down all the areas. Once you’re done washing, take one of our microfiber towels to dry it off.
For a nice shiny snowmobile, you can decide to polish and wax. You might as well wait till after the season to do this if you plan on taking your snowmobile out for several rides. Shop for a good snowmobile polish.
Sponge Outlet
Here at Sponge Outlet, we provide cleaning supplies for whatever your cleaning needs are. We have high quality microfiber towels, eraser sponges, and other cleaning supplies. Our products are non-toxic name-brands without the same price tag on them. We guarantee you’ll be able to get your snowmobile clean, shiny, and back to the way it looked before you took it out for a spin.
Contact Sponge Outlet at 877-776-6430 today to get your cleaning supplies!
The winter is here, and in many places, there will be snowy conditions. It’s always encouraged to not ruin our shoes and wear boots instead, but we still need to take care of them regardless of what they are. Here’s how you can clean those shoes or boots during the winter season.
Salt Stains in the Winter
With snow invading many areas of the country in the winter, salt stains can end up ruining your shoes or boots. For a simple do it yourself way, you can use this recipe to get rid of the ugly stains:
For leather boots and shoes, mix one parts water and two parts vinegar into a spray bottle.
Leather tends to dry out after using a vinegar solution, so once you’re done cleaning them, it’s advised to use a leather conditioner to preserve the quality of the leather boots or shoes.
For suede boots and shoes, you can use our eraser sponge to remove the loose dirt and debris. These will be great for cleaning off salt stains.
If You Don’t Have Salt Stains
There are times when you won’t have salt stains on your boots, but they’re still damaged from the wet conditions from the winter season. Wet suede boots are always annoying, but there is an easy solution. Use our eraser sponges to dab the wet spots on the material and let them dry out. Then, you can use a brush to get them back to its normal condition.
Get Your Microfiber Cloths and Sponges from Sponge Outlet
At Sponge Outlet, we provide the best cleaning products for whatever your needs are. We recommend you take care of your boots or shoes in the winter to preserve their condition. We take pride in our sponges and microfiber cloths because they remove the tough-to-get dirt and stains while being delicate on the material you’re cleaning.
Holiday dinners are a joyous time, but the mess that’s made is never a fun one. The cooking and prepping of food is exciting, until you get done with that last bite, then you realize it’s time to clean the entire mess up. Here are some products that will make it easier on your cleanup process. Sponge Outlet has the cleaning products to cater to your cleaning needs this holiday season.
For the Tough Places
Often, when cooking big meals for the holidays, the stovetop and surrounding areas may get coated with food and dry out. If you have a gas stove, the grease, grime, and food can be difficult to scrub down.
Remove the covers and soak them in warm soapy water while you scrub down the underneath with the grease and grime grabbers.
Then, you can use this cleaning product to clean the stovetop cover.
You can also use our Monster Scrubby Sponge, which works well to prevent scratches and marks on glossy surfaces. It’s a tough scrubber that stiffens up like a metallic-wool material in cold water, and in warm water, it’s plush and soft.
Countertops and Dining Table
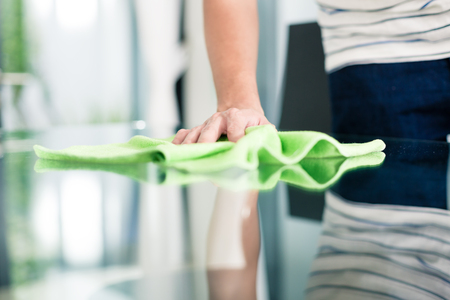
Countertops in the kitchen will get to become a mess, especially with elaborate holiday meals. It looks like a warzone in the kitchen after meal prep. Our eraser sponges are the perfect cleaning product to clean off your countertops and dining table. An Eraser sponge will leave your surfaces looking spotless!
Sponge Outlet
At Sponge Outlet, we provide cleaning products for whatever your cleaning needs are during the holiday season. We know this time of year can get hectic with cooking big meals for family and friends, and we want you to have the best, natural cleaning products to help you get the tough job done. Contact us at 877-776-6430 today to get more information on all of our cleaning products!
Working from home can be very convenient when you have time to be alone in your own home office. The key to getting work done is to keep your desk clean and organized, so it doesn’t give you any anxiety or stress during the work week. At the end of a long day, it can be easy to get up and leave work without cleaning up the space in front of you. It’s recommended to clean up your desk even after you work to eliminate germs, dust, and other particles.
Eating at Your Desk
We all eat at our desks on occasion, especially if we’re in work mode and don’t feel like stepping away to take a break from the work. If you’re done drinking that cup of coffee, rinse out the mug. If you’re done eating the food in that bowl, get rid of it. Make sure to get rid of your food or scraps after you are done. Clean up the space.
Purchase an eraser sponge, a good cleaning solution, clear your desk completely off, and wipe it down. This will help ensure that dust, grime, crumbs, and germs are eliminated.
Remove the Dust
You want to protect your technology from dust settling in. You can easily wipe down a computer or laptop with a microfiber towel. It won’t scratch the screen and it won’t leave behind small particles.
Reorganizing the Desk
After a successful day of working from home, it’s important to reorganize your workspace to get it ready for the next day. We tend to keep things “just in case” but if you haven’t used that memo pad in four years, you probably don’t have a purpose for it.
Sponge Outlet
Sponge Outlet provides cleaning products for all of your needs. If you’re in need of natural cleaning products to help clean your desk at home efficiently and accurately before the next day, contact Sponge Outletat 877-776-6430 today to get more information on our cleaning products!
A kitchen appliance that gets often overlooked when cleaning is your fridge. This is something you should be paying attention to on a regular basis, or else you’ll regret it later when it gets to be a mess. And when it gets to be a mess, no one wants to try and clean it. Attack the problem before there is a problem! Here are some tips:
Supplies You’ll Need:
Gloves
Garbage Can
Recycling Container
Toothbrush or Small Scrubbing
Eraser Sponge
Cloths
Baking Soda
Take out all the food in your fridge
While you’re checking all the food in your fridge, throw out the expired food and leftovers that aren’t needed anymore. Remove all the food and keep it away from all of your cleaning supplies.
Clean out all the extra crumbs and food items in the fridge
After removing crumbs, use your eraser sponge to wipe down everything in the fridge. Take out the drawers and shelves and wipe them down separately. Use the sponge on the walls of the fridge and the outside of the fridge too.
Putting food back into the fridge
When putting the foods back in their place, wipe down the containers. Jelly can get sticky awfully quick and make it hard to clean up later.
Consider putting down shelf liners on the shelves and drawers. These peel off easily and will help keep everything cleaner for longer.
On a weekly basis, go through your fridge and get rid of foods you haven’t eaten that are going stale. Do this on garbage night so you don’t get stuck with funky smells.
Sponge Outlet
Sponge Outletprovides cleaning products for all of your needs. If you’re in need of natural cleaning products to help clean out your fridge efficiently and accurately, contact Sponge Outletat 877-776-6430 today to get more information on our cleaning products!
Here’s how to deep clean your bathroom with the help of Instant Erase eraser sponges!
Fully Cleaning the Bathroom Shower
Take the shower head off the wall and place in a bag with white vinegar. Let that sit overnight, so that it soaks. Soaking it in vinegar will help to dissolve any mineral build-up and help unclog the shower head’s holes. Take down your shower curtains and wash them in your washer with a few towels. The towels will provide extra scrubbing power for the shower liner.
Finally, using an Instant Erase eraser sponge, clean all the areas of your shower including the corners and edges of the shower, the shower door and tiles. The melamine eraser sponge works great to clean tile grout. Since the sponges only use water and gentle scrubbing to clean, leave a sponge in the shower at all times for quick cleans in-between showers.
Use an Eraser Sponge on Bathroom Walls
Use the Eraser Sponge to remove all mildew spots from tiles and grout. If you come across very stubborn spots use a tooth brush with bleach to get it clean. The eraser sponge is a great product to use when you’re looking to get a spotless shower and bathroom.
Scrub the Toilet
Put a cup of baking soda into the toilet bowl and let it sit for a few minutes then scrub with a toilet brush. If there are any spots on the rim or edge, use a piece of an eraser sponge to remove them. Use the eraser sponge to scrub the toilet seat and the outside of the toilet. Dispose of the sponge when finished.
Now, you need to clean the toilet brush. Using the toilet seat to hold the brush between the bowl and the seat, pour a mixture of bleach and water over it. Let it air dry. Then, clean out the brush holder by letting it soak in soapy water.
Clean spots and grime on the sink
Use white vinegar to pour down the drain and flush with hot water. Flushing the drain with vinegar and water will help remove any clogs or buildup in your drain plus it will destroy smells. Use a new eraser sponge to clean the faucet and vanity top.
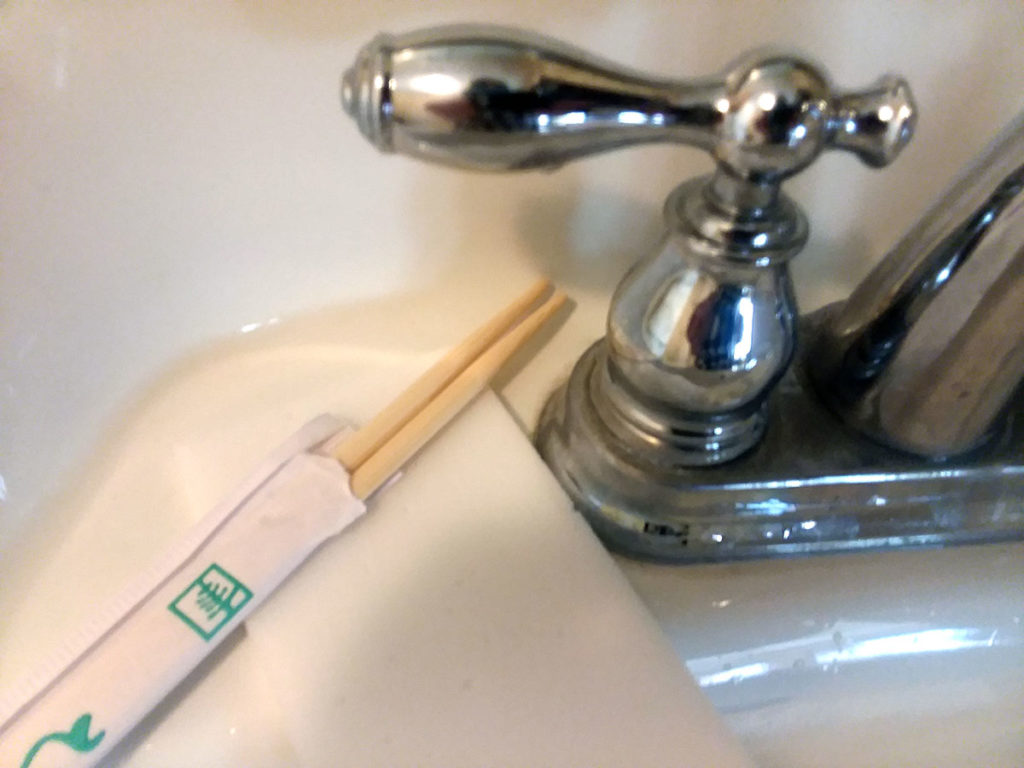
Here’s a hack from ApartmentTherapy.com, use a chop stick to get underneath faucets, around handles and into corners, in order to remove dirt and grime from hard-to-reach areas of your bathroom. Alternately, you can also use dental floss to pull out all of the grime from tiny cracks under the faucet handles. If you need more scrubbing power, try using a thin and flexible melamine eraser sheet.
With the use of the right products, your bathroom will be sparkling clean in no time. Sponge Outletsells top cleaning brands for less, helping you get the job done at a fraction of the cost.
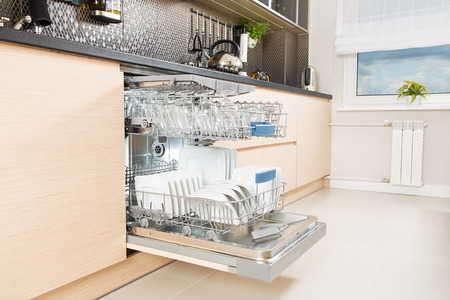
Your dishwasher is one of the hardest working appliances in your kitchen, considering it cleans the grime and food off your dishware. It makes sure your dishes, glasses, silverware, and cooking accessories are sparkly clean. Keeping it clean and well-maintained will help get dishes as clean as possible and also extend the life of the appliance.
Clean the Gasket Seal Around the Dishwasher Tub
The plastic or rubber-like seal around a dishwasher tub helps to secure it and prevent any water leakage. Over time, the seal can become dirty and possibly smell. Use an eraser sponge to remove any dirt, grime or food particles from the seal. Check the racks and the silverware basket to make sure they are clean as well. Over time, dirt can build-up and food particles can become trapped, especially inside the basket. Some silverware baskets are removable and can be cleaned in the sink. An eraser sponge can also help remove dirt and grime from racks and the basket.
Remove and Clean the Dishwasher Filter
Check the bottom of the rack or consult your owner’s manual to see if there is a removable filter that should be cleaned. Many newer-models of dishwasher have a filter that can be removed and washed out in the sink. The filter traps food and other foreign objects from being sucked into the dishwasher pump and damaging or clogging it. To clean any filters, pull out the bottom rack and check for a removable filter. You may also have protective caging at the bottom of your dishwasher that is removable as well. Unsnap it and rinse it off in the sink with a sponge. Snap the caging or replace the filter back into place once it is clean.
Run a Cleaning Cycle
Many modern dishwashers have a cleaning cycle that can be run to clean the inside of the dishwasher. Use a commercial dishwasher cleaner, or else place a cup of plain white vinegar in the top rack of the dishwasher and run a normal cycle. Some blogs suggest using bleach to clean your dishwasher, however if the inside of your dishwasher is stainless steel this can lead to corrosion and damage. As ever, follow the manufacturer’s instructions to extend the life of your dishwasher and minimize maintenance.
Having a pet as a member of your family is truly a great experience, but there comes a price with it like everything else. Cleaning up after your pet can be annoying because it’s usually a common occurrence. Whether it’s cleaning up their eating area or cleaning up an accident they had in the house, an eraser sponge is the way to go.
Why the Eraser Sponge?
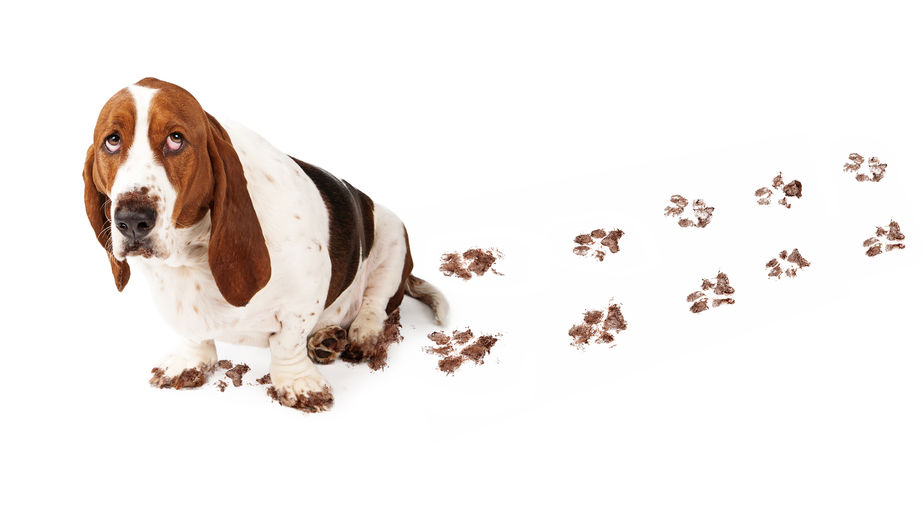
As parents of animals, we don’t always have the time to grab a bucket, fill it with water, and wet a mop, to wipe up floors; or time to get down on our knees with a bucket full of water and a sponge to clean up scuffed cabinet doors. The eraser sponge makes it easy to clean up spills, scuffs, and dirty paw prints in a snap. Also, it is simple to use for cleanup, so you can show your kids how to clean with it. The eraser sponges from Sponge Outlet are strong enough to use on almost any grit, grime or dirt without compromising your counter-tops, walls, floors or other surfaces.
Giving a small child a mop and bucket of water can create even more of a mess than the one you were attempting to clean.
Keep the eraser sponges handy, and have your kids watch you clean up scuffs and marks left by your pets; then engage them in the activity with you.
After using this technique, your kids will be able to always clean up after your pet makes some kind of a mess. An eraser sponge is your all-purpose cleaning tool for households with pets. You won’t need to switch up from a sponge to a mop.
You can clean all your pet’s messes with the eraser sponge; making the clean-up process easier and quicker. Now you can get back to the other tasks on your to-do-lists.
If you’re looking for an easier way to clean up after your pet’s mess, contact Sponge Outlet at 877-776-6430to find out more on our eraser sponges and how they can help with pet messes.
Cleaning out your microwave is never a fun job to do, but sometimes we forget to put that paper towel over the food we are re-heating and the result is some splatter on the walls of the microwave. We even sometimes put off cleaning it up because we say we’ll clean it the next day. But in reality, this usually gets put off for a week or two, and it becomes the dirtiest place in the kitchen. No one wants to heat up food in the microwave if it’s dirty.
A Dirty Microwave Can Cause Health Issues
We should be cleaning our microwave after each time we use it but most of us don’t. Sponge Outlet’seraser sponges are the perfect tool to use to clean out a dirty microwave. Using our eraser sponge, scrub out any food splatters from walls, rotating tray, and door. This will help get all of the tough spots cleared out first. Some food may be hard to remove but the eraser sponge can handle tough grit, grime, and dirt.
After, Steam Clean the Microwave
Using a microwave-safe bowl, vinegar, water, and a sponge, you can get your microwave looking brand new. Pour an equal amount of water and vinegar into a bowl, usually half a cup of each works well.
Put a toothpick into the solution before you start. You’ll notice that bubbles form on the toothpick allowing it to boil without exploding.
Leave the bowl in your microwave for about 5 to 10 minutes depending on how dirty it is. When the minutes are over, let the microwave stand with the door closed for several minutes allowing steam to penetrate the microwave.
Be sure to have oven mitts on hand in order to take the bowl out which will be extremely hot.
After you remove the bowl, stick the eraser sponge into the bowl when the solution is still hot and scrub the rest of your microwave.
Make sure you wipe down corners, windows, walls, and the outside of the microwave as well.
Our eraser sponges are also disposable so once it cools down, it can be thrown out. Visit Sponge Outlet or call 877-776-6430 to find out about more of our cleaning products!
Your bike is your loyal companion out on the road or trail. When you return from a long day of pedaling, chances are you’ll toss your favorite bike shorts and windbreaker in the washing machine—but when’s the last time you washed your bike?
If your bike is looking a little worse for wear these days, but you’re not sure where to get started to make it look like new again, you’re in luck: SpongeOutlet is here today with a step-by-step guide to cleaning your bike. Read on, pick up the supplies you need, get started, and then get back to the trails!
Plus, cleaning your bike regularly will maintain its paint job and keep it looking as good as the first day you rode it out of the bike shop. If you don’t clean your bike regularly, the dirt and grime build up can start to impact some of its mechanical integrity.
Gather Your Cleaning Supplies
You’ll need a few things to properly clean your bike, so the first thing you should do is gather your supplies. Grab two buckets, bottle brushes if you have them, a soft microfiber cloth, regular sponges, eraser sponges, a garden hose, degreaser for the chain, and dish soap.
Depending on the type of bike you have, there may be specific cleaning instructions, so make sure you check the internet before you dive in with your scrub brush. If your bike company or brand recommends a certain type of soap, it’s probably a good idea to pick up a bottle. Your bike is made to last through tough conditions, but it’s important to make sure you’re doing everything you can to maintain its paint.
Step One: Clean Your Bike Wheels
The first thing you want to do is fill your buckets with dish soap and water and remove the wheels from your bike. Use a soft, plastic brush to gently remove grease and grime from your wheels. Don’t forget the valve, spokes and hub, and flip the wheel over when you finish one side.
One of the buckets will be the grimy bucket, and the other will be the finishing bucket. Use the cloth or sponge in the grimy bucket to do your first round of washing—give everything a good wipe down.
Once you give everything a good scrub, hose down the wheels. Then, swap to the finishing bucket, and re-scrub everything. This will ensure you loosen all of the fine dirt that might be stuck in your wheels’ nooks and crannies.
Once you’re done with the wheels, check the tires for air and set them aside to dry.
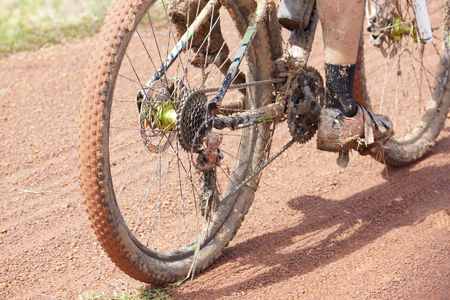
Step Two: Clean Your Bike Chain
Use a degreaser, and apply it to each of the links: Bicycling.com says turning the cranks backwards can make it easier to reach each and every link. If your chain is still a greasy mess after you use your degreaser, you can apply a little dish soap and run your eraser sponge around the chain.
A little grease left over is OK, as long as you remove the major build up. Rinse the chain, repeat if necessary, and move on to step three.
Step Three: Clean Your Bike Frame
Next up is the frame: use a soft sponge or microfiber cloth and start at the top and work your way down. Start by wetting the frame with a garden hose, and then using your cloth to scrub it. Tough spots can be tackled with eraser sponges, just be careful not to damage the paint with too much harsh scrubbing.
Rinse, repeat, and then buff with a dry microfiber cloth to make sure all areas of the frame have dried to a sparkling finish. Buffing your bike after you clean it with a microfiber cloth can actually prevent dirt from sticking to it while you’re out on your next ride!
Step Four: Clean the Smaller Parts of Your Bike
Use a toothbrush to get the grime and grease out of any hard-to-reach areas on your bike, and don’t forget to dry and buff those areas really well when you finish up. And, remember to wash things like handlebars, cup holders, and pedals. Some of these pieces may be easy to remove, so if you’re going for a deep clean, snap off the pieces and clean them before reattaching them to the bike.
Just like any pastime, riding a bike can be fun, relaxing and rewarding, but it’s important to take care of your equipment. After all, you spent a good deal of money on it! So, remember to regularly wash your bike, and if you’re not up for a weekly deep clean, a wipe down with a microfiber cloth and some soapy water after a ride in between deep cleans will do the trick.
For more tips on cleaning items around your car, office and home, check out our blog. Contact SpongeOutlet today if you have any questions about our products or how you can use them to keep your life sparkling clean!






 Step Two: Clean Your Bike Chain
 For more tips on cleaning items around your car, office and home,